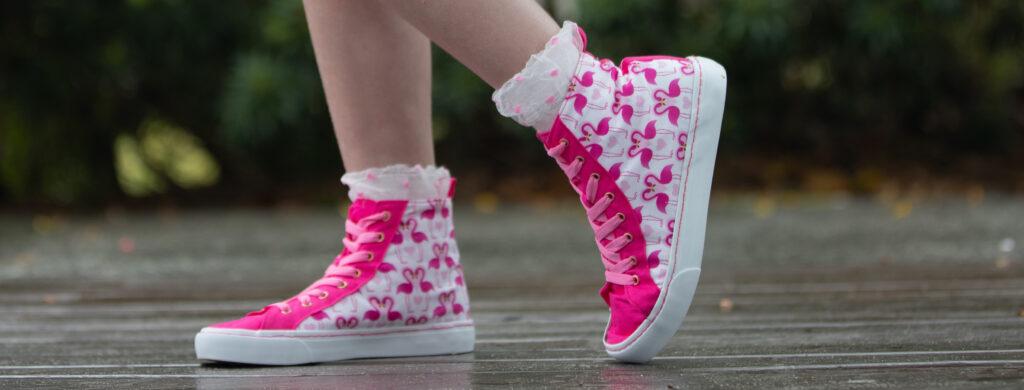
This step by step tutorial will show you how to take a pair of cheap shoes, pull it apart and make your own.
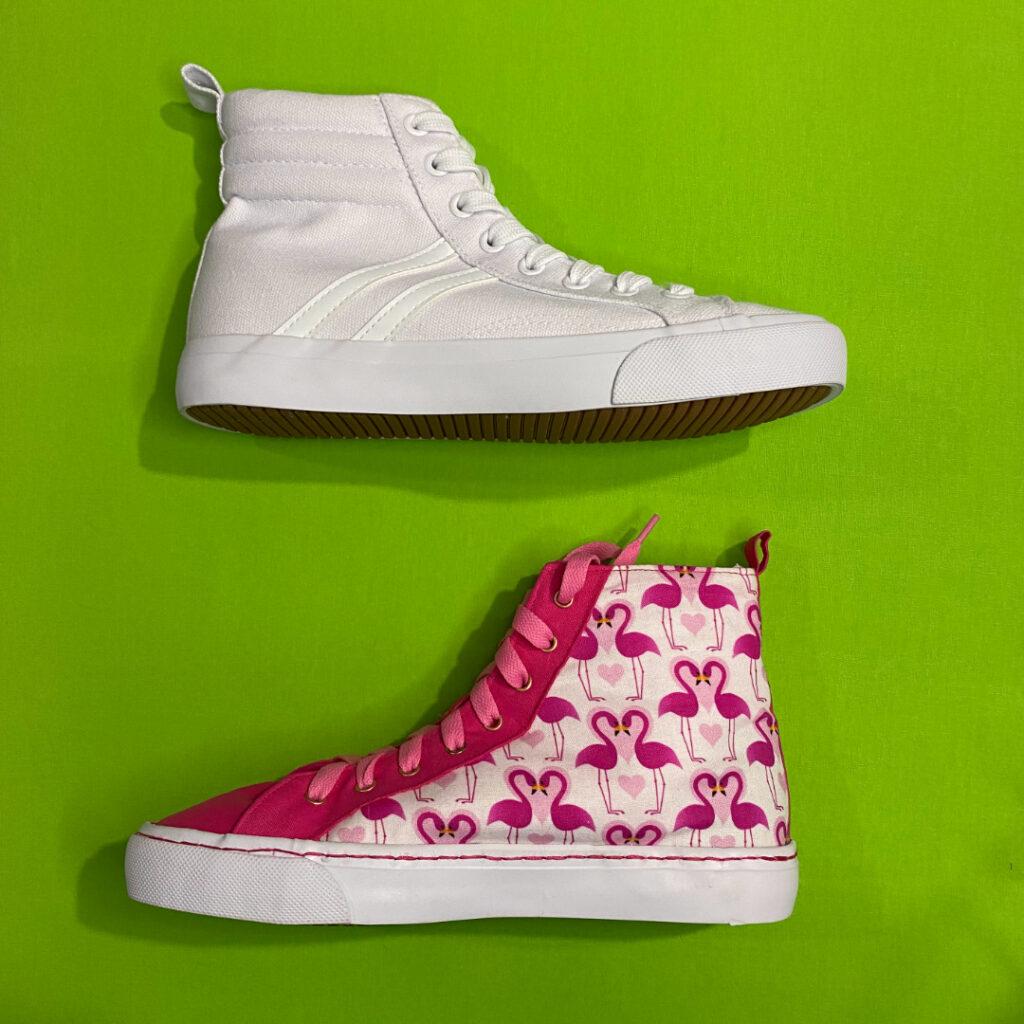
Here I took a cheap pair of $11 kmart high tops and transformed them into the pink love bird shoes.
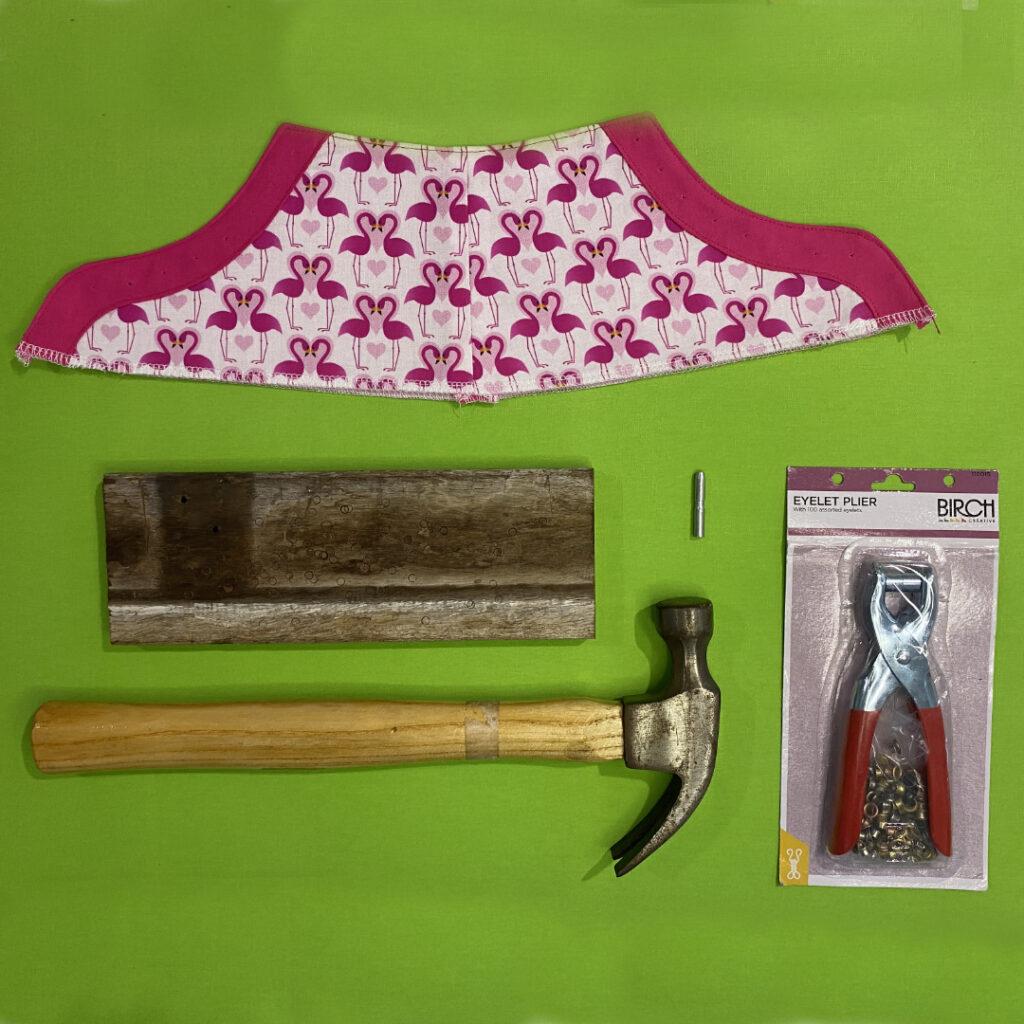
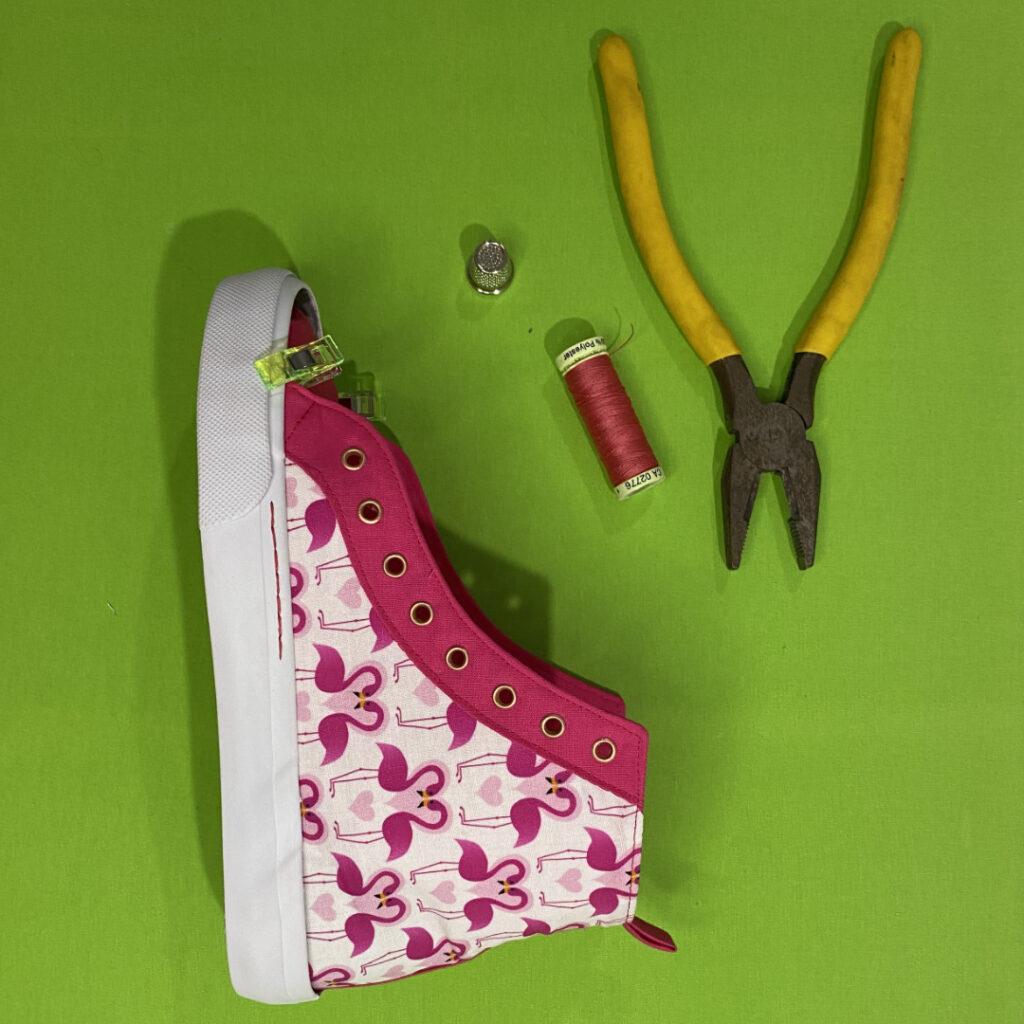
Materials Needed:
A pair of store bought shoes (see below for how to select shoes)
Sharp scissors (not your good sewing scissors)
Fabric of choice
Topstitching thread
Large sewing needle
Eyelets
Sewing machine
Heavy/stiff interfacing
Thimble
Pliers
Tailors Awl
Sewing Needles and Pins
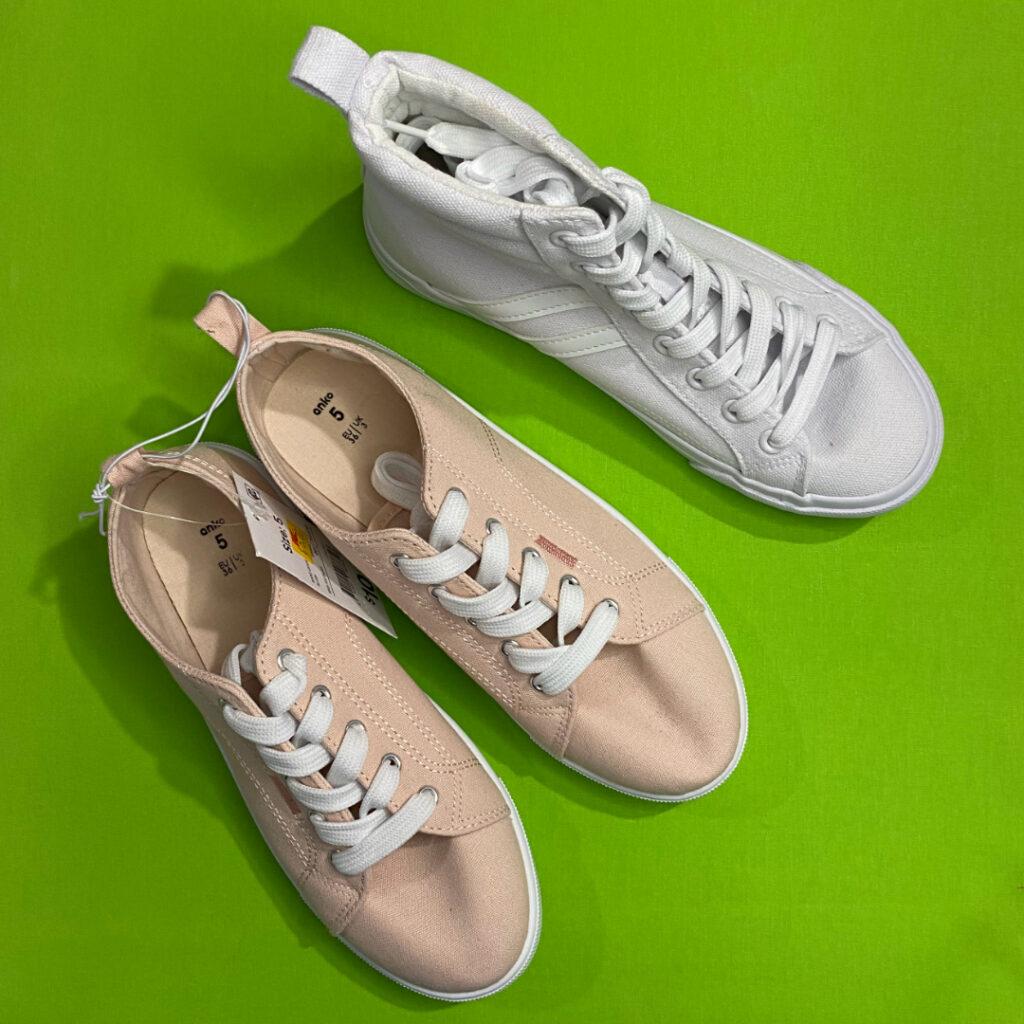
STEP 1 – SELECTING THE SHOES
Start by selecting a pair of cheap shoes. Look for shoes with a rubber sole that can easily be pulled off
Test the shoes before purchasing, to make sure the sole can be removed by gently trying to pull it away from the upper part of the shoe.
You can purchase these shoes at a store like Kmart, where you can find affordable options.
Aim to find shoes on sale, as this will help keep the cost of your project low.
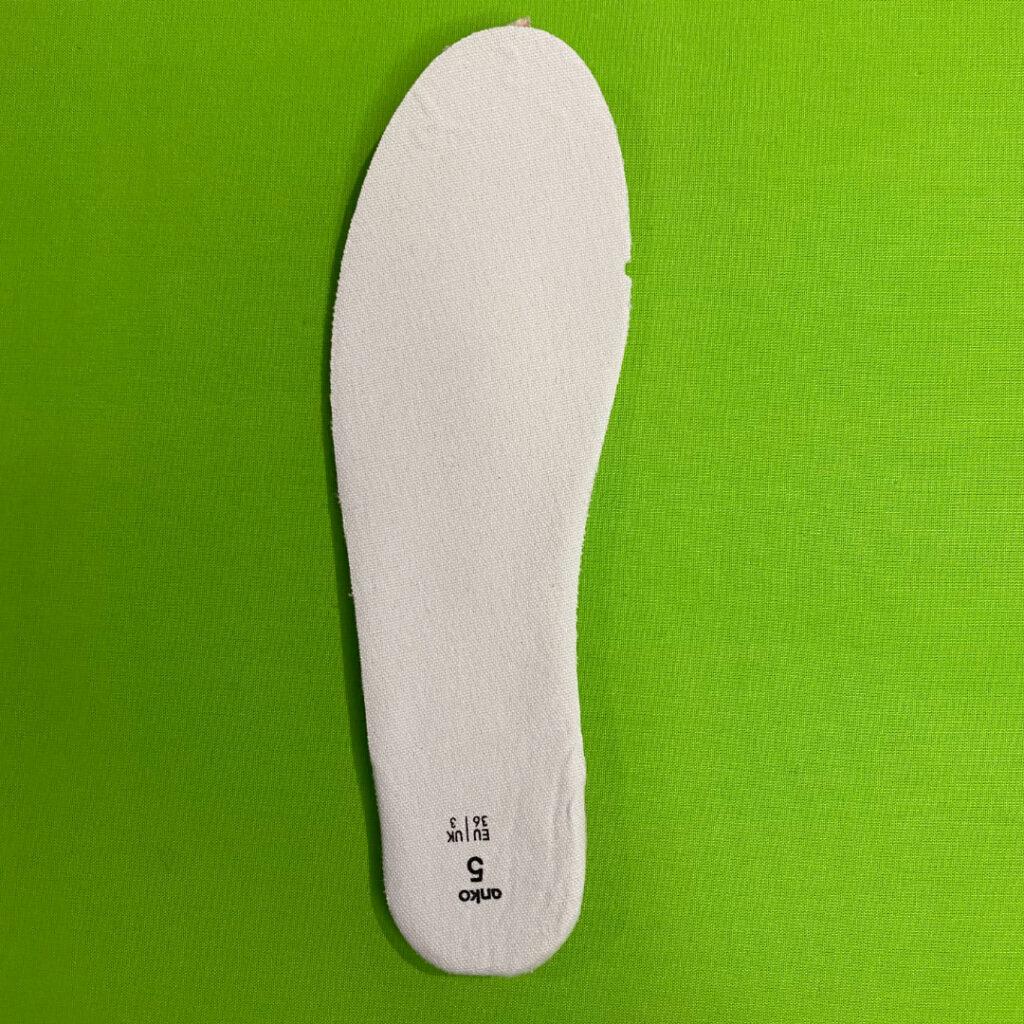
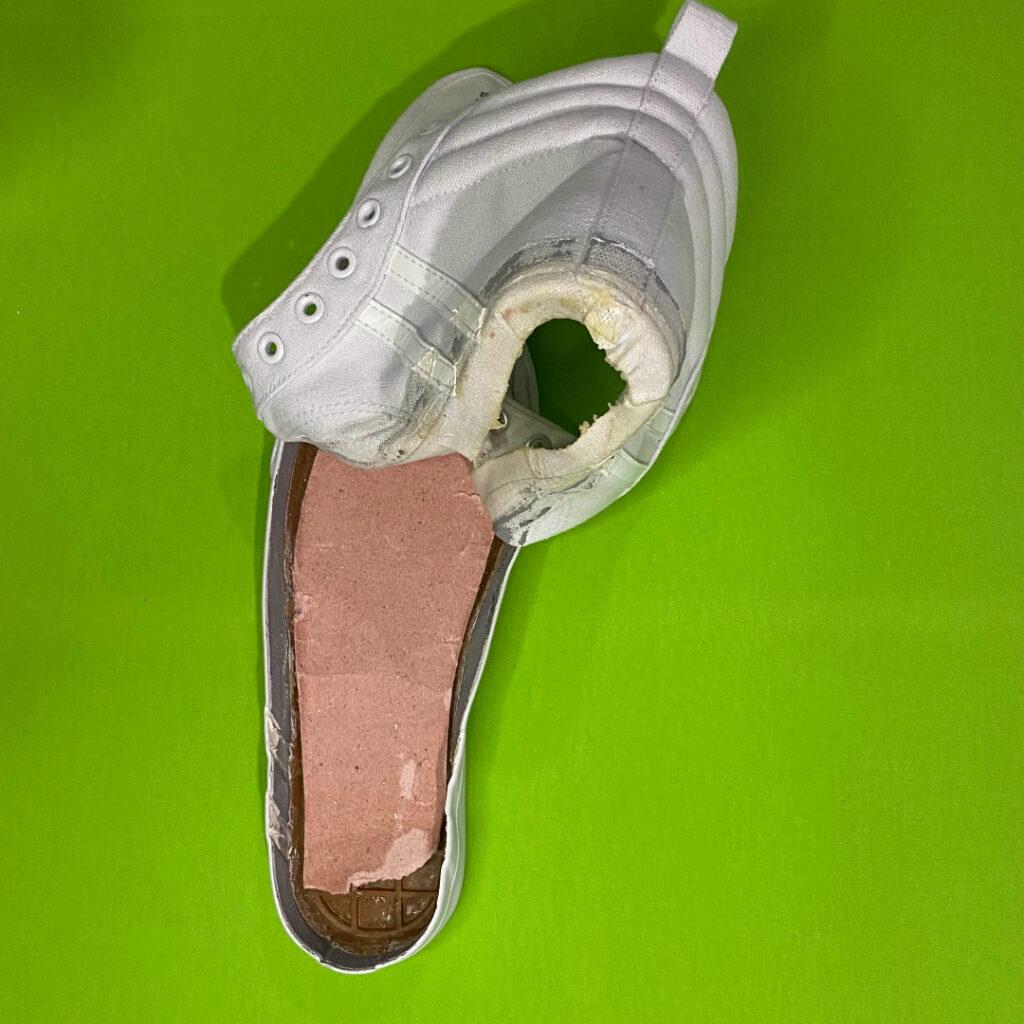
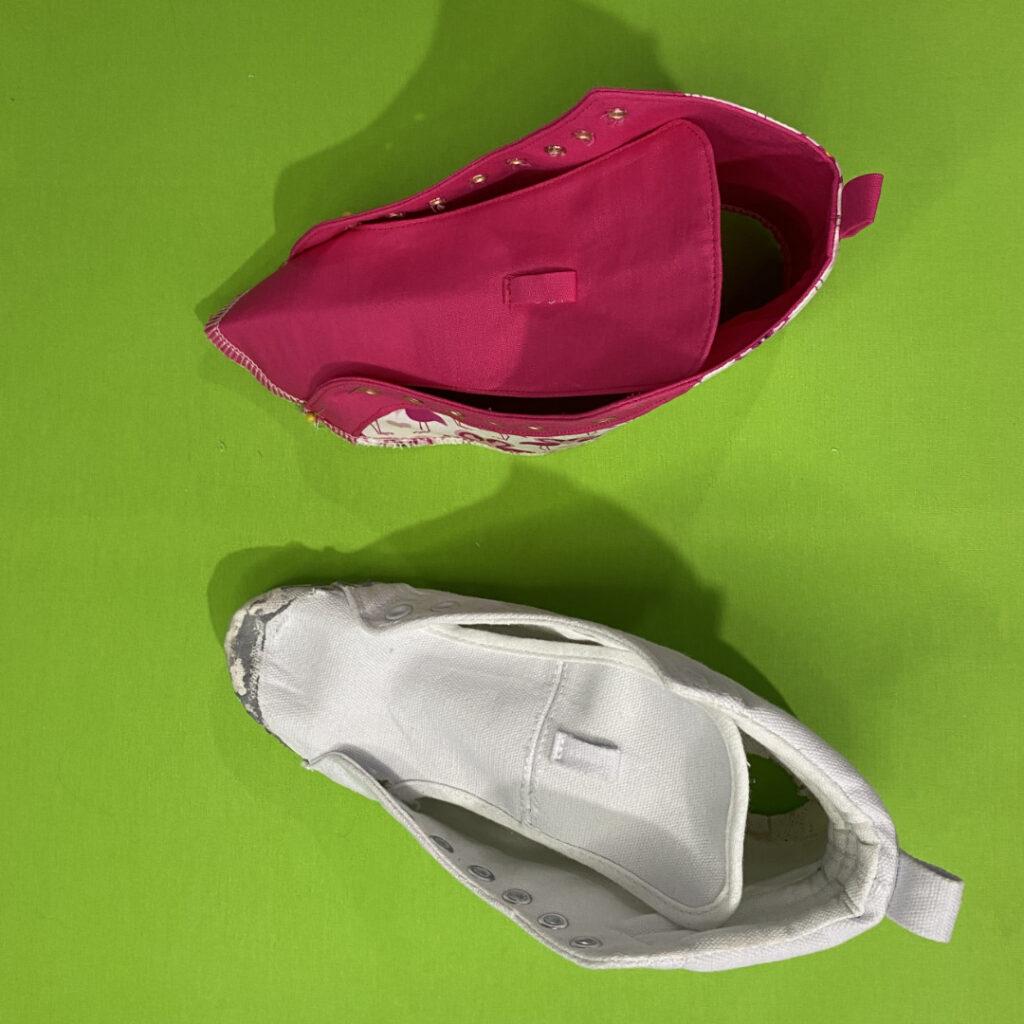
STEP 2 – REMOVING THE INSOLE
The first step to making your own shoes is to pull the current pair apart.
Firstly, lets remove the insole. To do this, bend the shoe in half so that the insole lifts in the middle. Use your finger to carefully wedge under the gap between the insole and the shoe and work the insole off.
Be gentle and take your time, as the insole is likely glued on and could tear if you are not careful.
It is important to keep the insole in one piece as you will need to put it back into the shoe at the end.
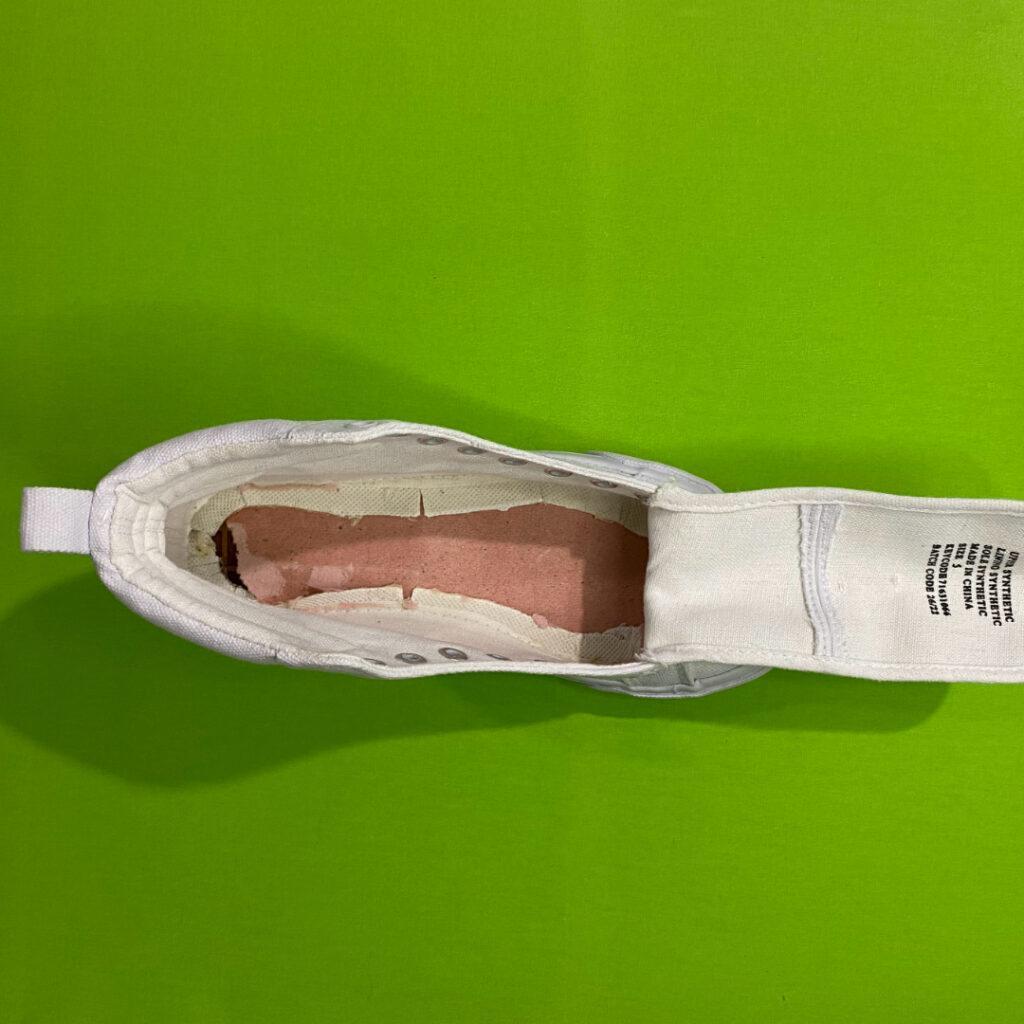
Once you have removed the insole, you will have two pieces: the insole itself and the shoe.
Set aside the insole for now, as you will need it at the end.
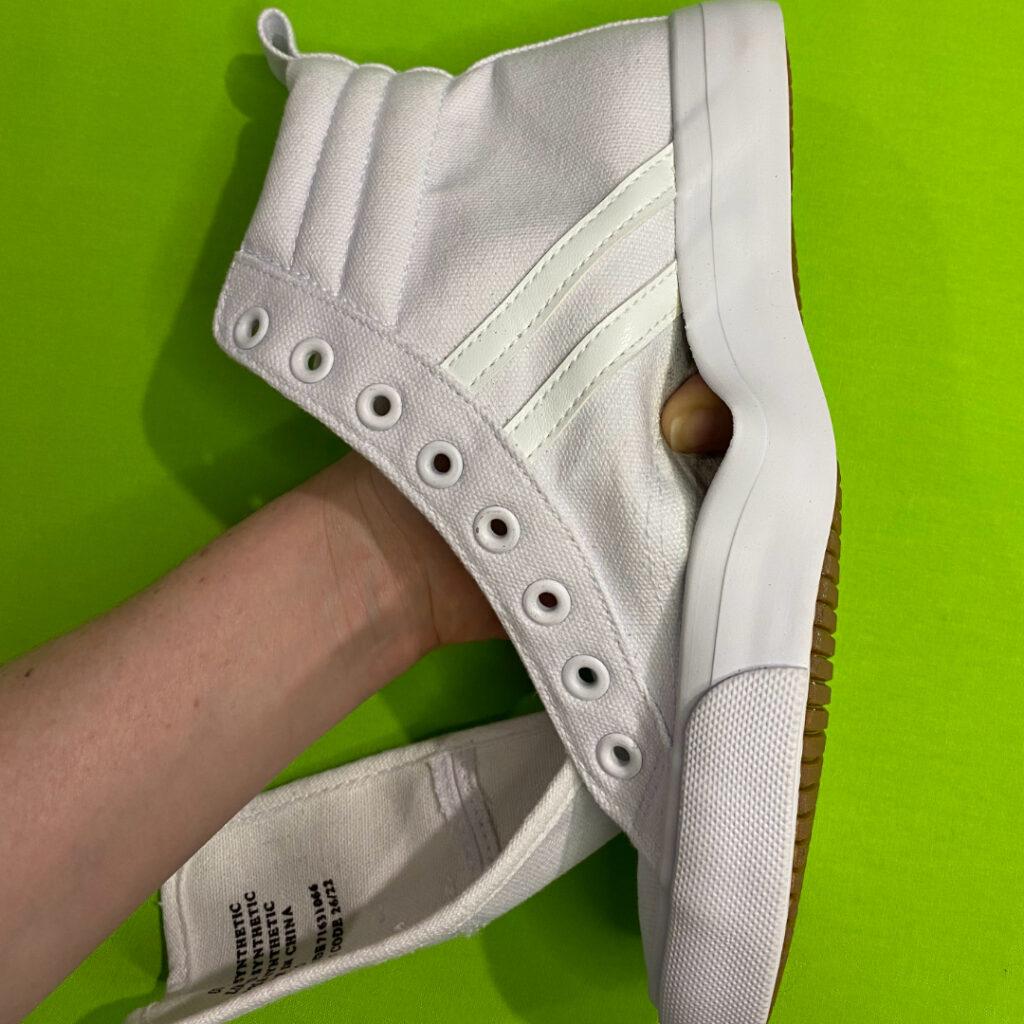
STEP 3 – REMOVING THE SOLE
The next step is to separate the fabric part of the shoe from the sole.
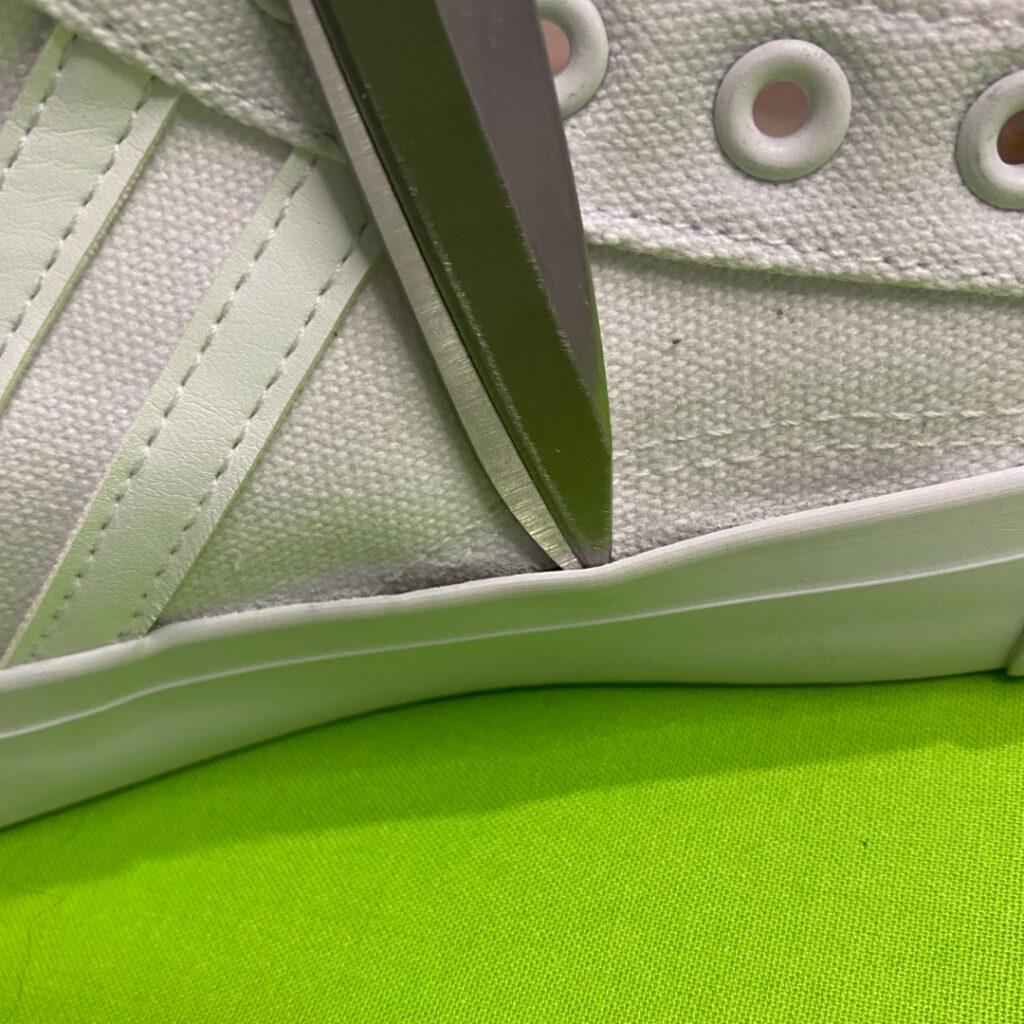
The sole is likely glued on with a high strength adhesive, so you will need to wear down the glue to loosen the edges of the sole.
To do this, use a pair of scissors (not your good sewing scissors) to grind the glue down by rubbing the scissors backwards and forwards along the edge of the sole.
This step is important to prevent tearing and should be done around the entire sole.
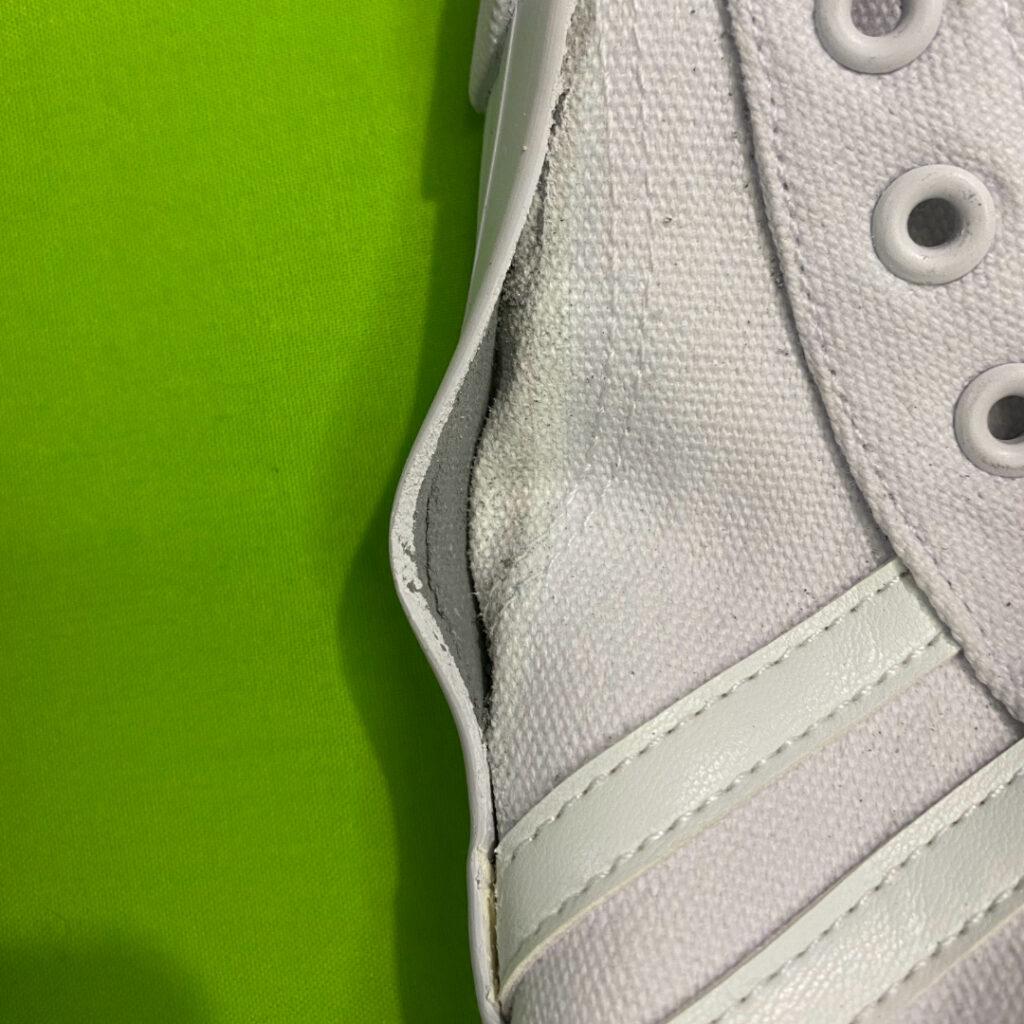
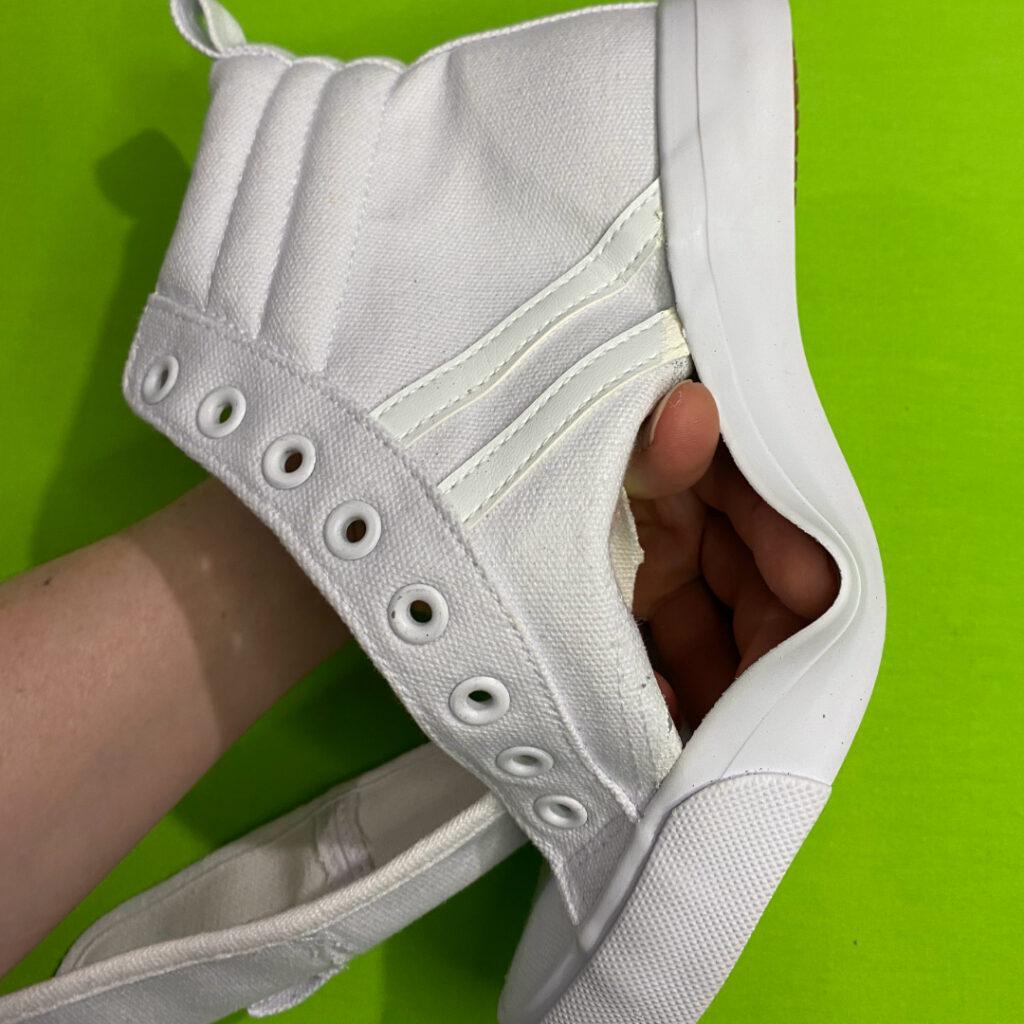
Once the glue has been loosened all the way around, pick a spot on the side of the shoe to start your first separation.
Grind the glue down until you have a hole that you can get your fingers through, then start to carefully tear the sole away.
If a section is too difficult to tear, continue grinding the glue down until you can.
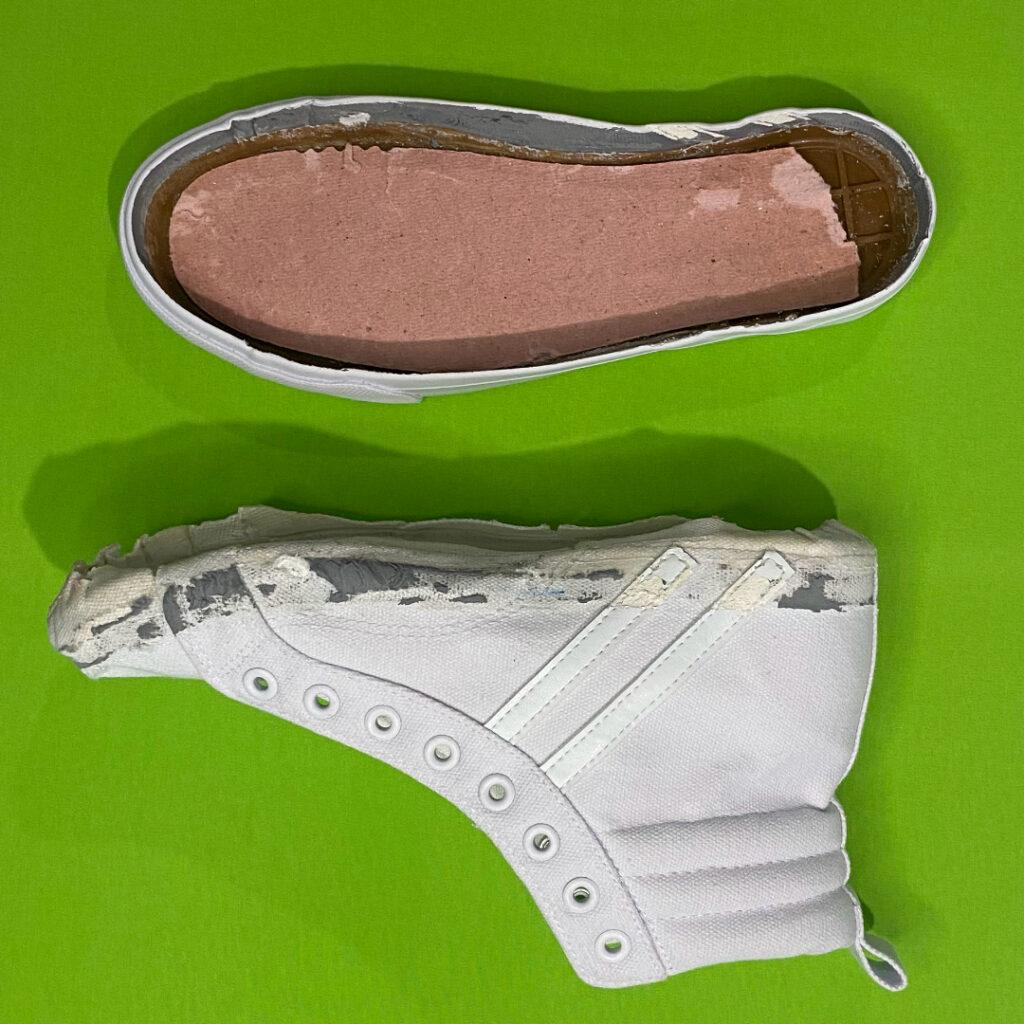
After separating the sole from the fabric part of the shoe, you will have two pieces: the sole and the fabric part of the shoe. Set the sole aside for now.
Note: I tried heating the glue with a hair dryerand did not find that it made the process any easier.
STEP 4 – MAKING THE PATTERN
In the following steps, you will be using the current shoe to make a pattern for your new shoes.
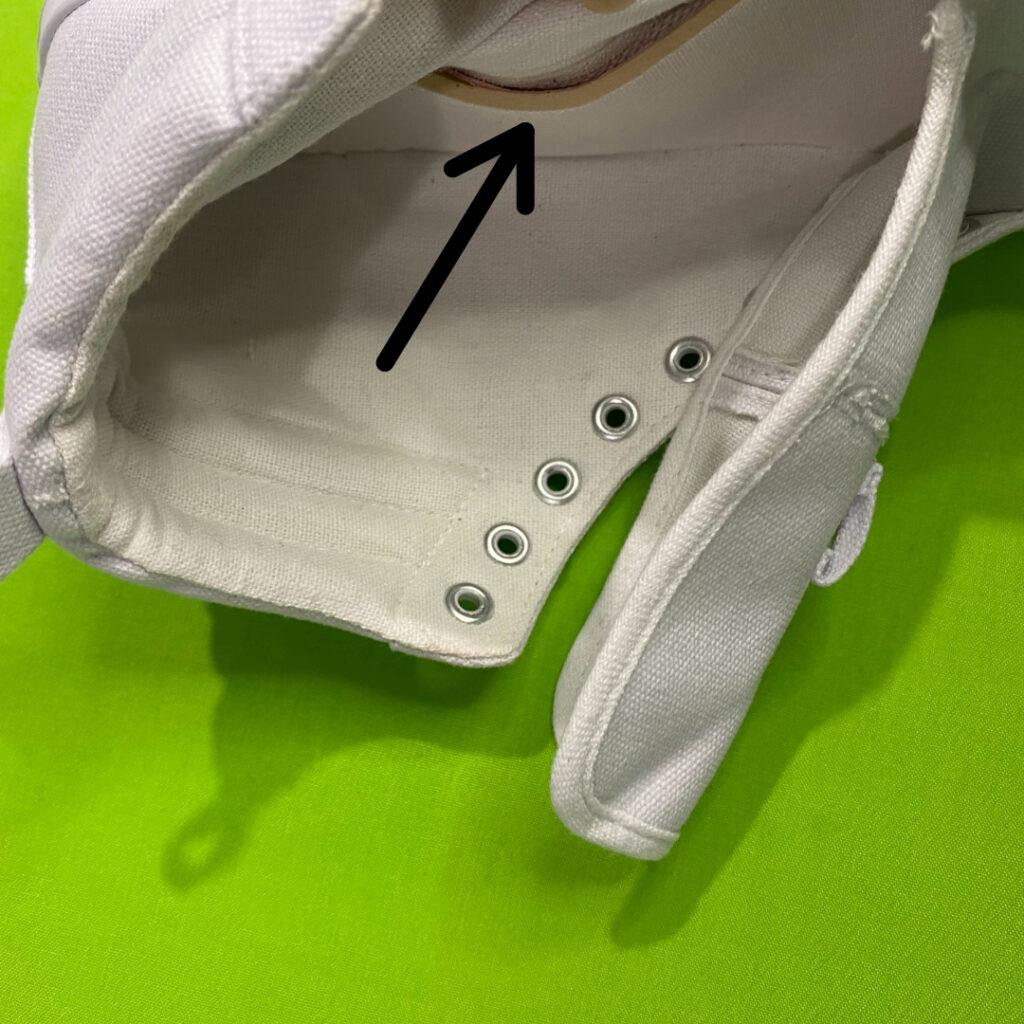
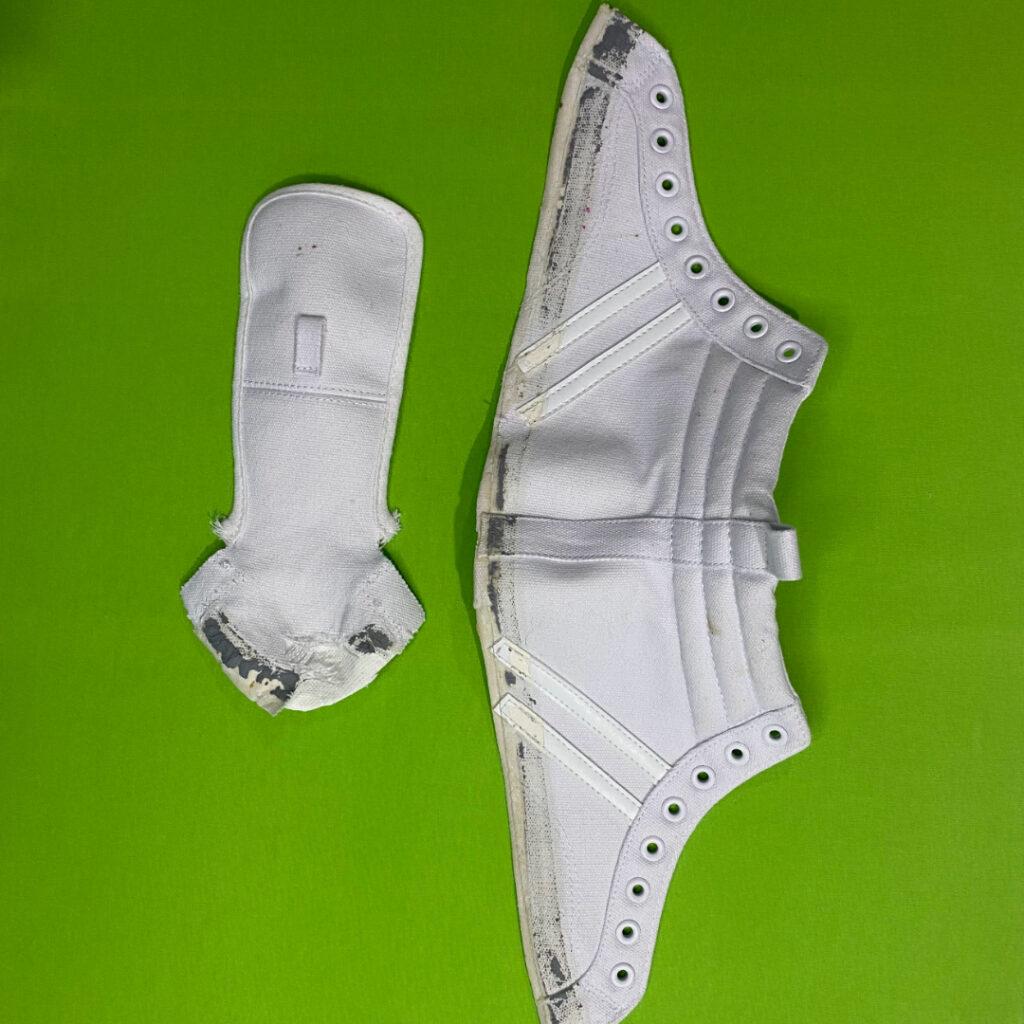
First, cut away the bottom part of the shoe that originally folded underneath the insole. We will be stitching our shoe on a little differently and do not need this part.
Next, separate the tongue by carefully unpicking the stitches that hold it in place.
Finally, remove the hard heel cap piece and set aside for now.
Leave the other shoe assembled as we will use that later to line up our pieces.
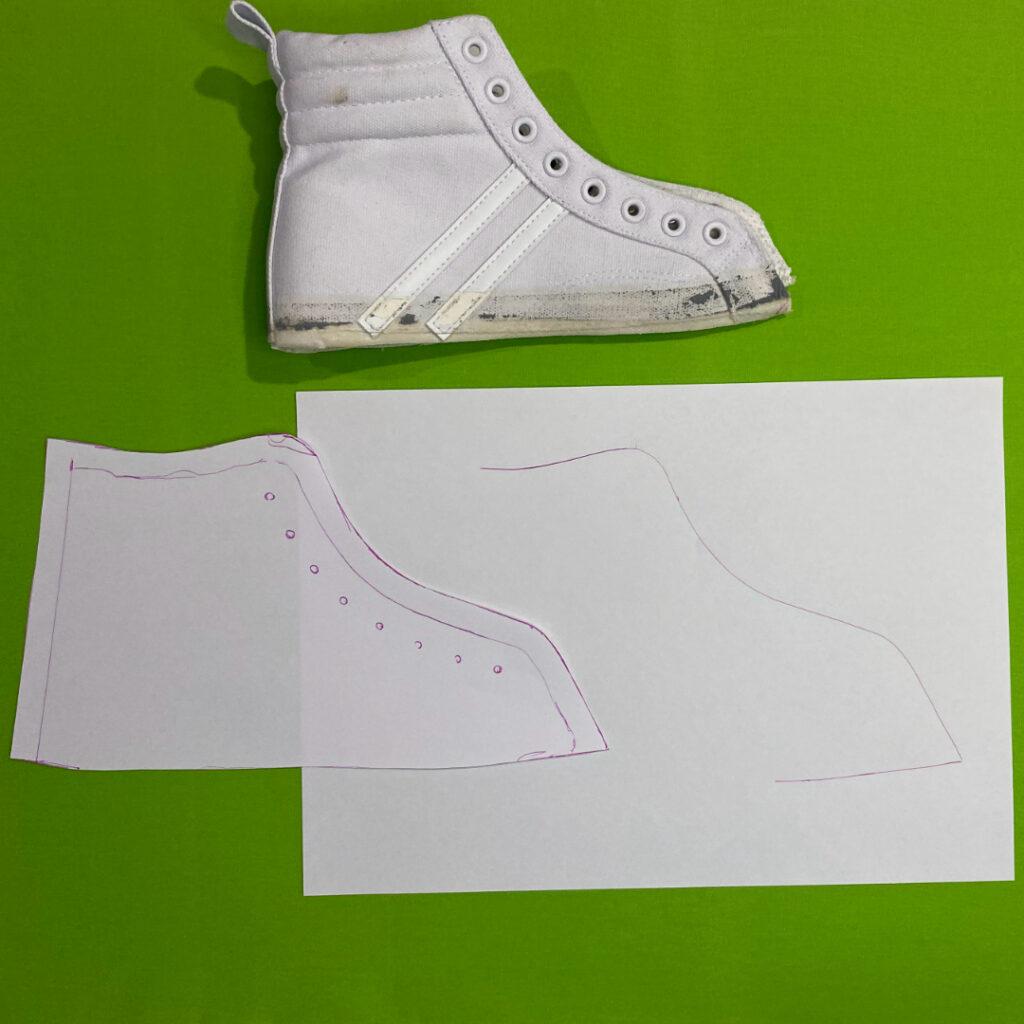
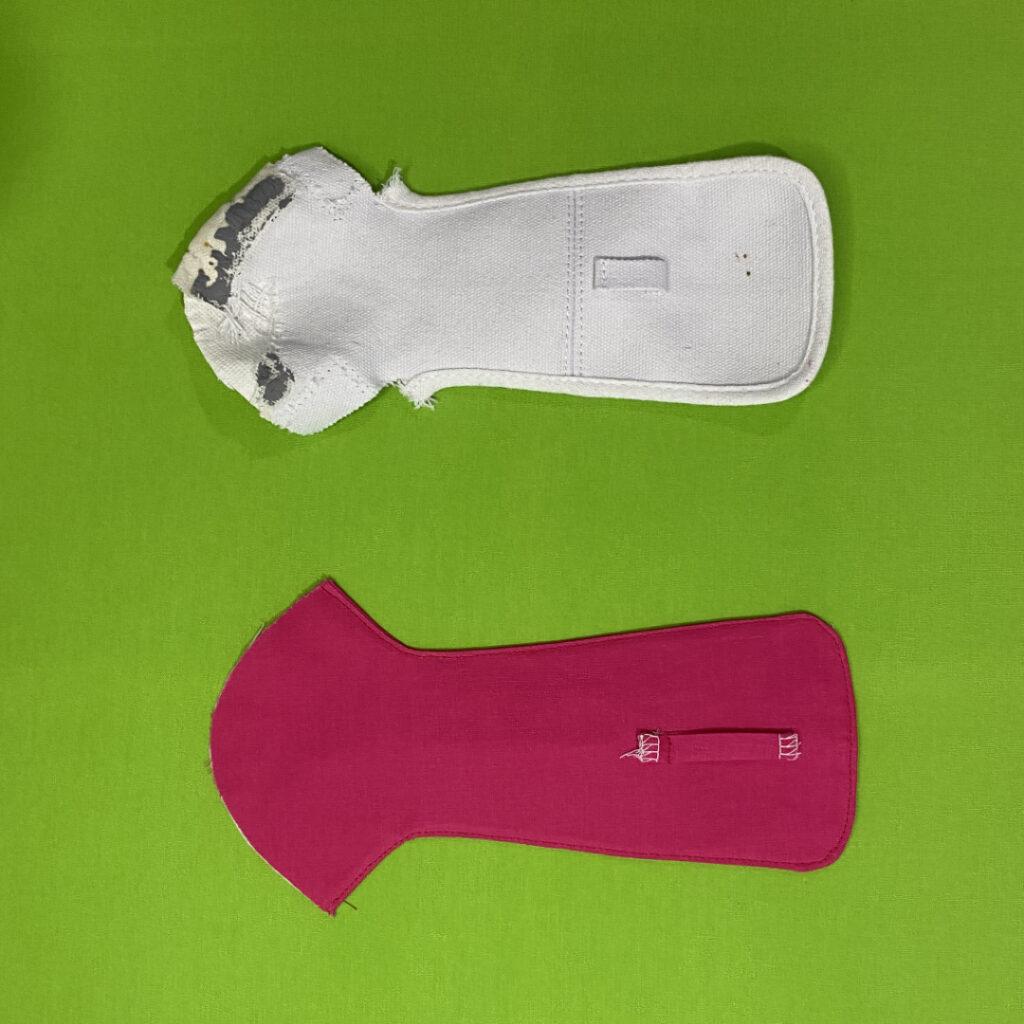
STEP 5 – TONGUE PATTERN
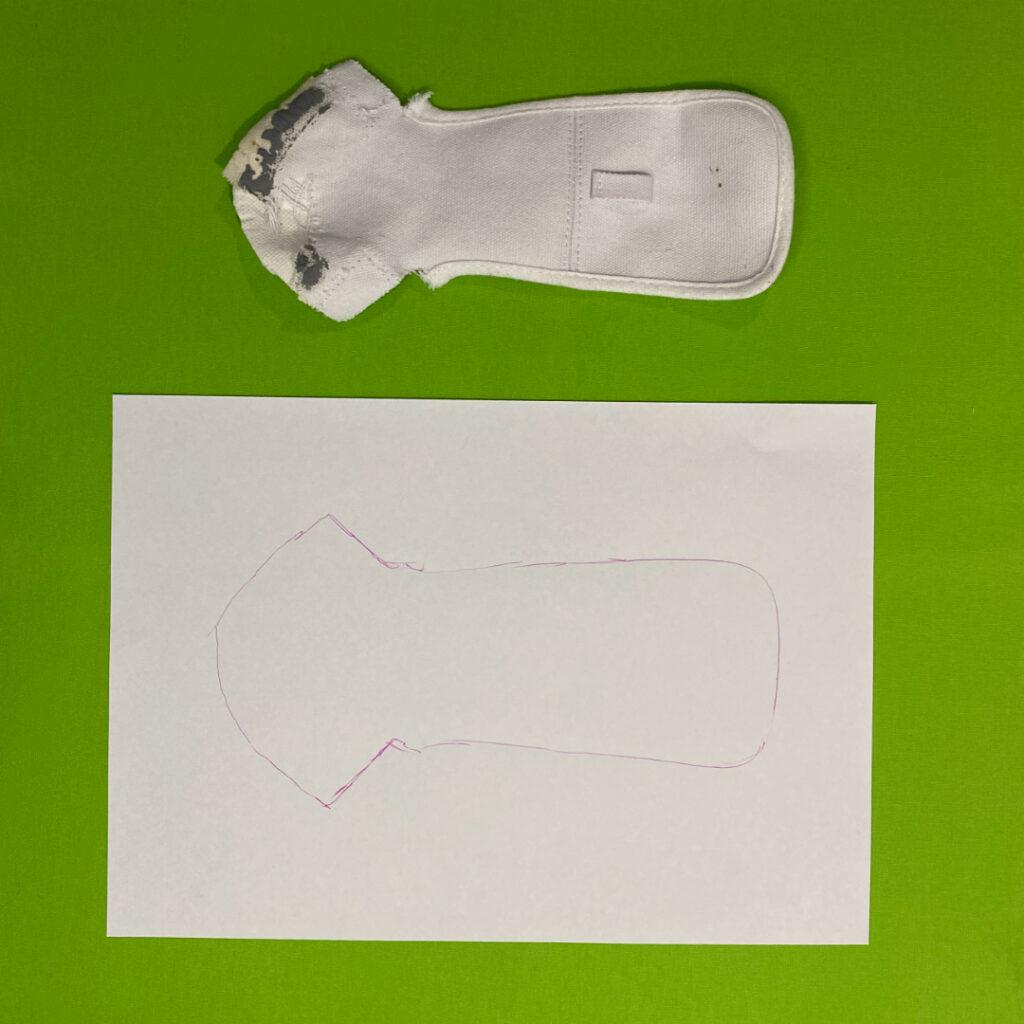
To make the pattern for the tongue, trace the shape of the existing tongue onto a new piece fo paper.
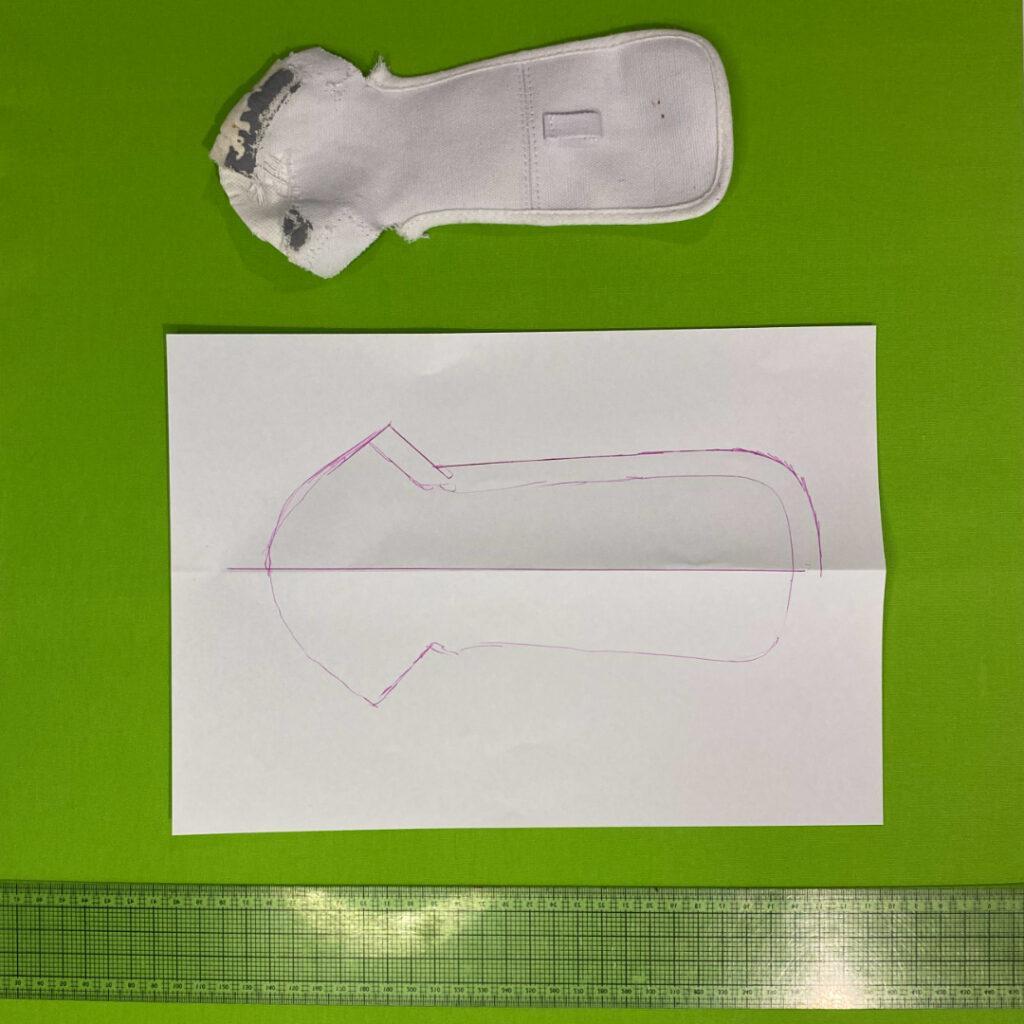
As the tongue piece is symmetrical, fold it in half to find the centre.
Use this centre line to make a symmetrical pattern piece by adding a 1cm (3/8′) seam allowance to the outer edge, stopping at the fold line. (There is no need to add seam allowance to the bottom edge)
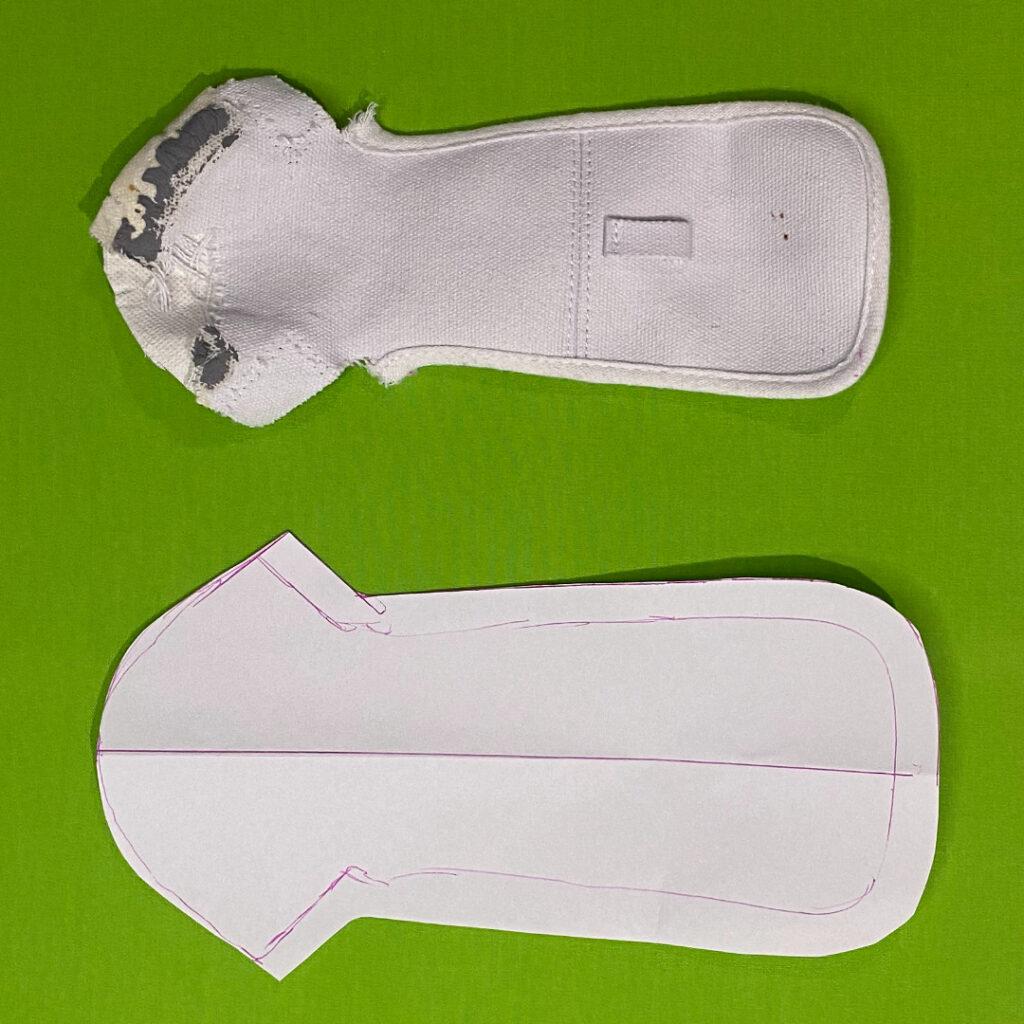
Once you have added the seam allowance, fold the piece in half and cut along the new line. When you open it, you will have a perfectly symmetrical tongue pattern piece.
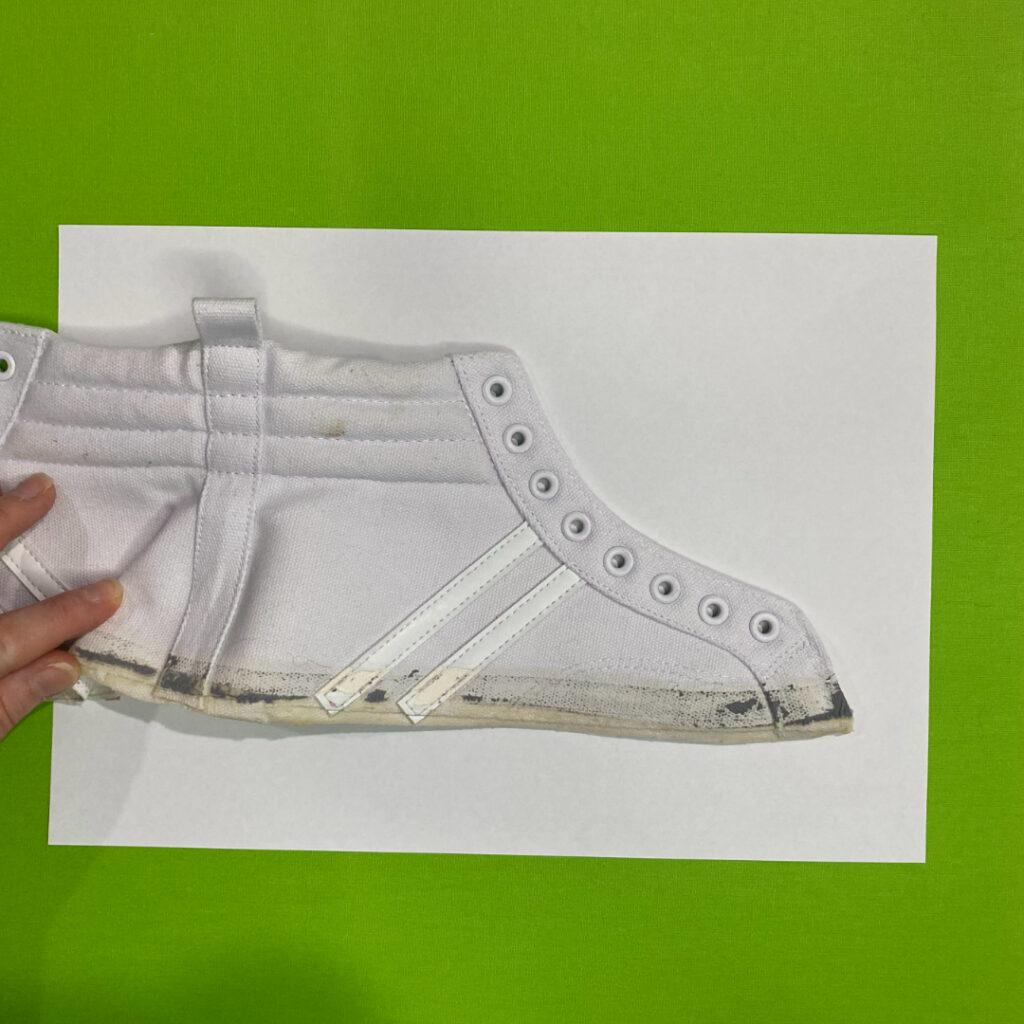
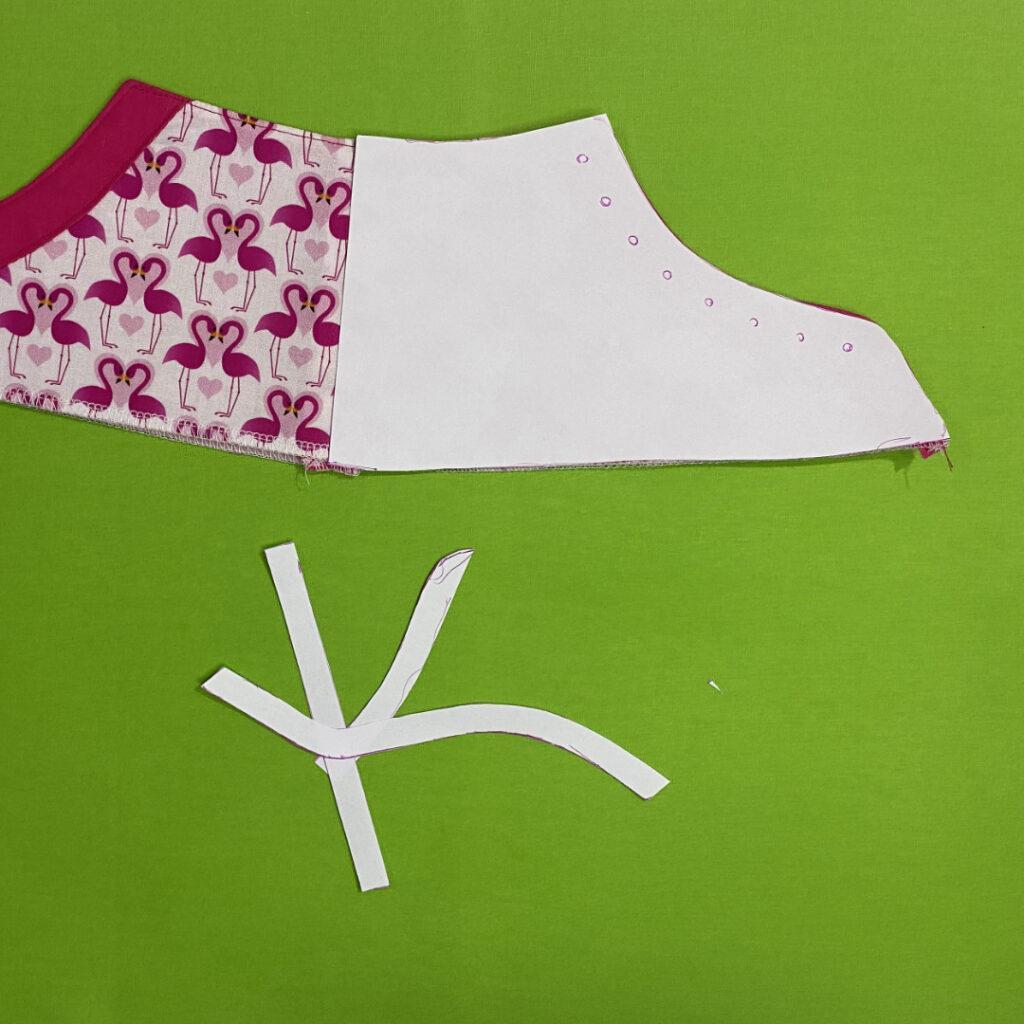
STEP 6 – SHOE SIDE PATTERN
To make the front part of the shoe pattern, fold the shoe in half vertically and place it on a piece of paper.
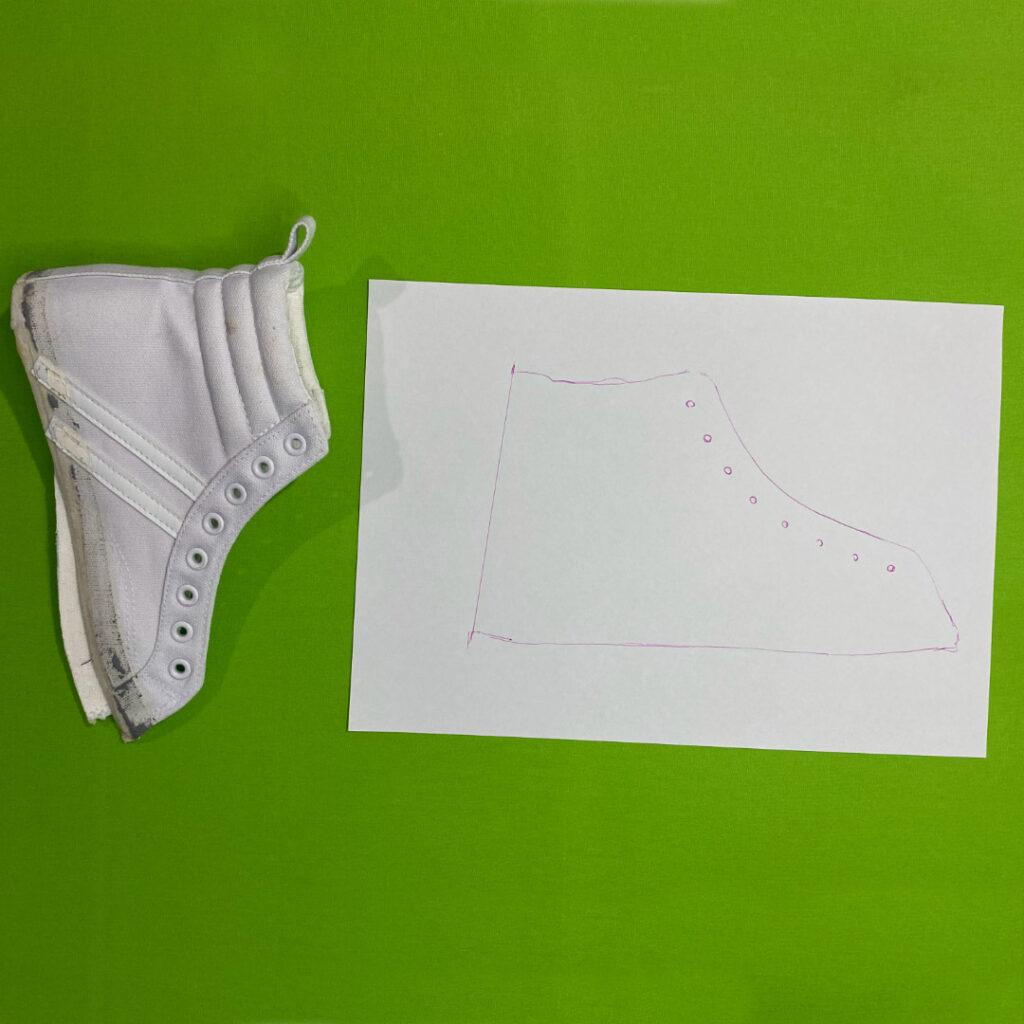
Trace around the shoe, making sure to mark the position of the eyelets.
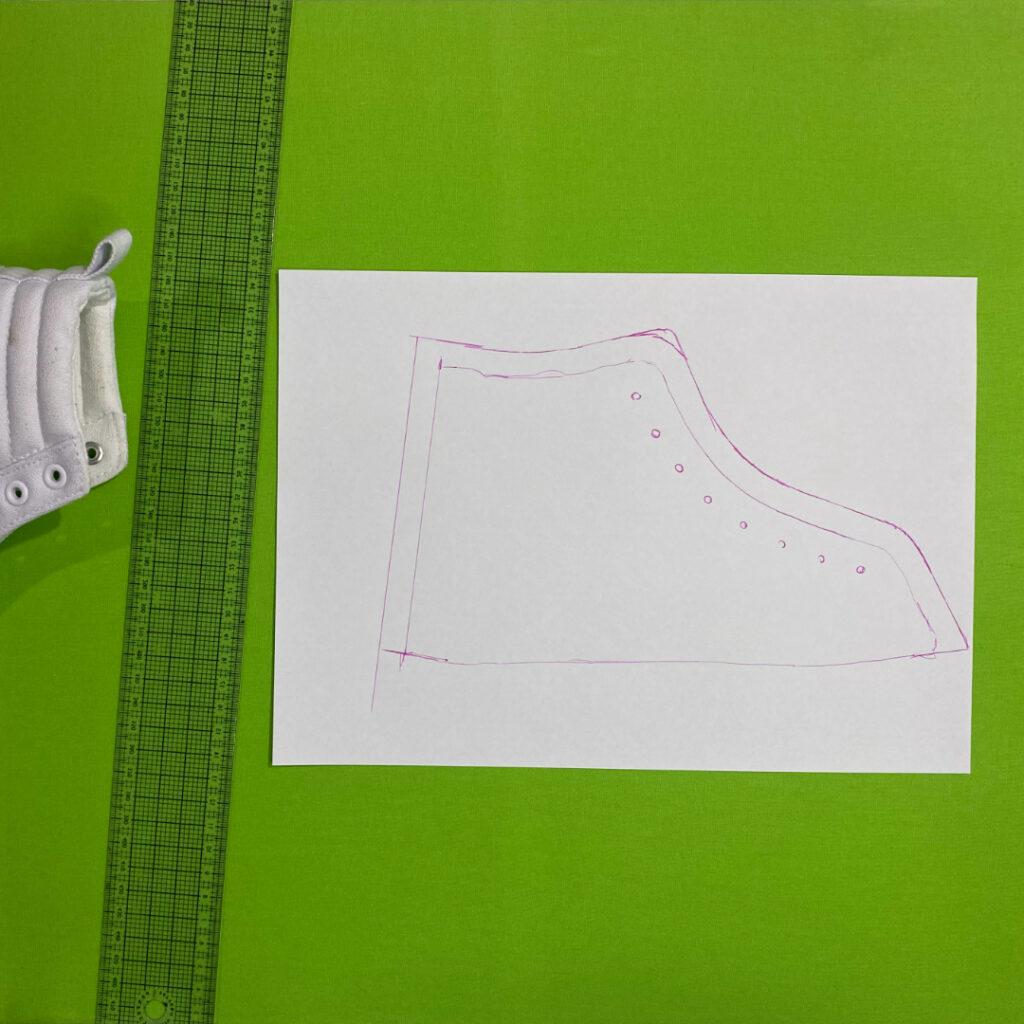
Next, add a 1cm (3/8′) seam allowance around the entire outer edge except for the bottom.
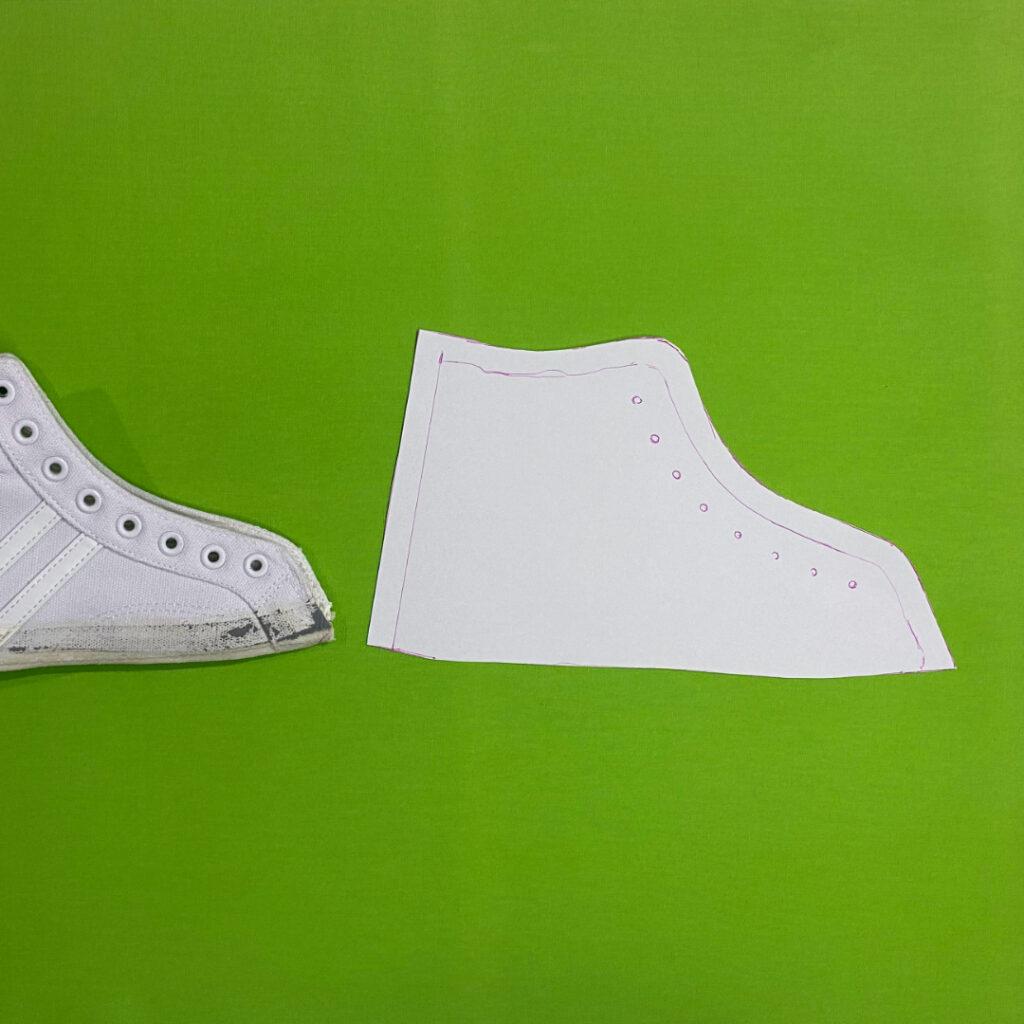
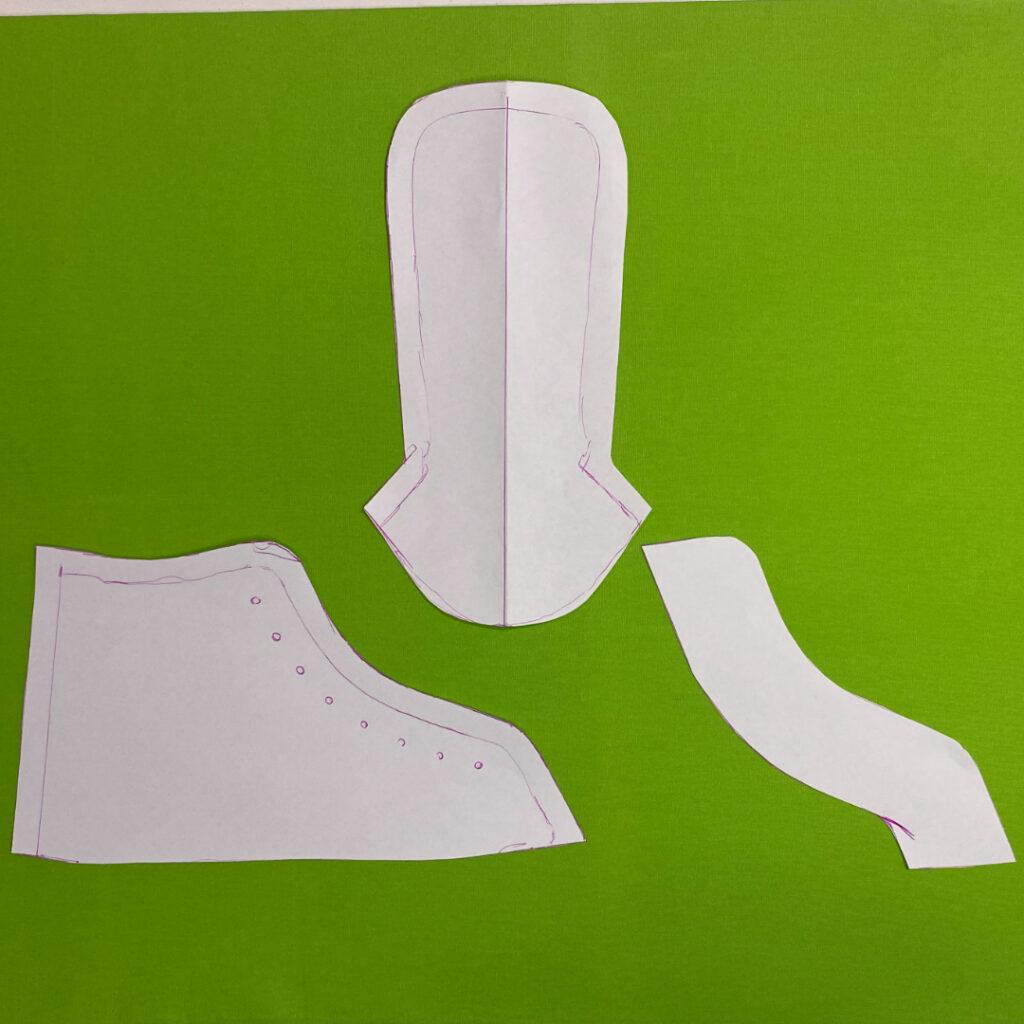
Cut out your piece and now you have the completed shoe side pattern piece.
STEP 7 – EYESTAY PATTERN
To make the last pattern piece, which will provide extra support for the eyelets, follow these steps:
Trace the front edge of the SHOE SIDE PATTERN piece.
Measure the width of the piece on your current shoe or make a design choice and decide on your own measurement. For those who have shoes that don’t have this piece and would like to add one, you can use my measurement which was 2.5cm (1″).
Add to the above measurement seam allowance x 2 which is 2cm (6/8″). If you are using my measurement your new amount is 2cm + 2.5cm so equals 4.5cm (1 3/4″)
Measure inward from the front edge of your traced pieced by the calculated width. (Mine was 4.5cm (1 3/4″))
Cut your piece out.
You have now successfully completed the pattern for your custom pair of shoes!
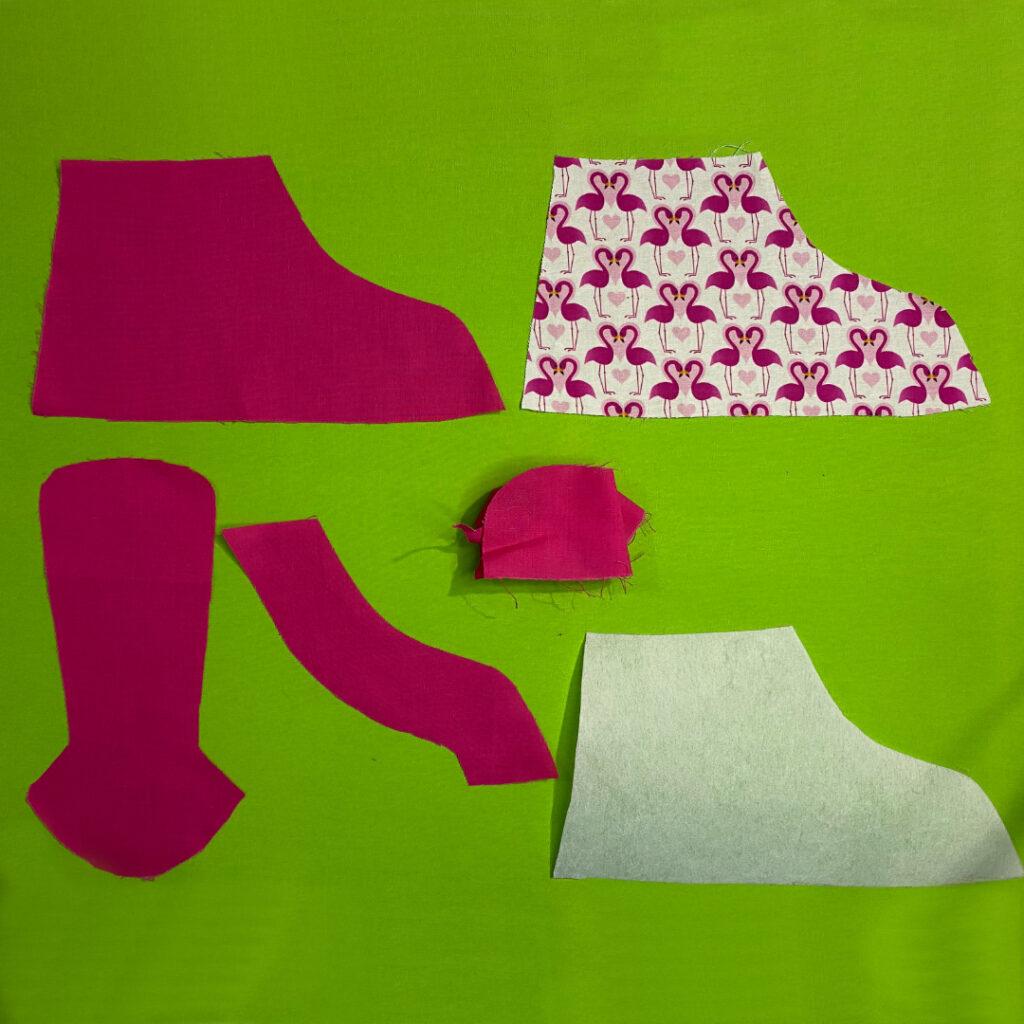
STEP 8 – CUT OUT YOUR MATERIALS
To make 2 pairs of shoes you need
FABRIC
4 x Eyestay Piece (Mirrored) 2 x Tongue Piece 4 x Shoe Side Piece (Mirrored)
LINING
2 x Tongue Piece 4 x Shoe Side Piece (Mirrored)
INTERFACING
2 x Tongue Piece 4 x Shoe Side Piece (Mirrored)
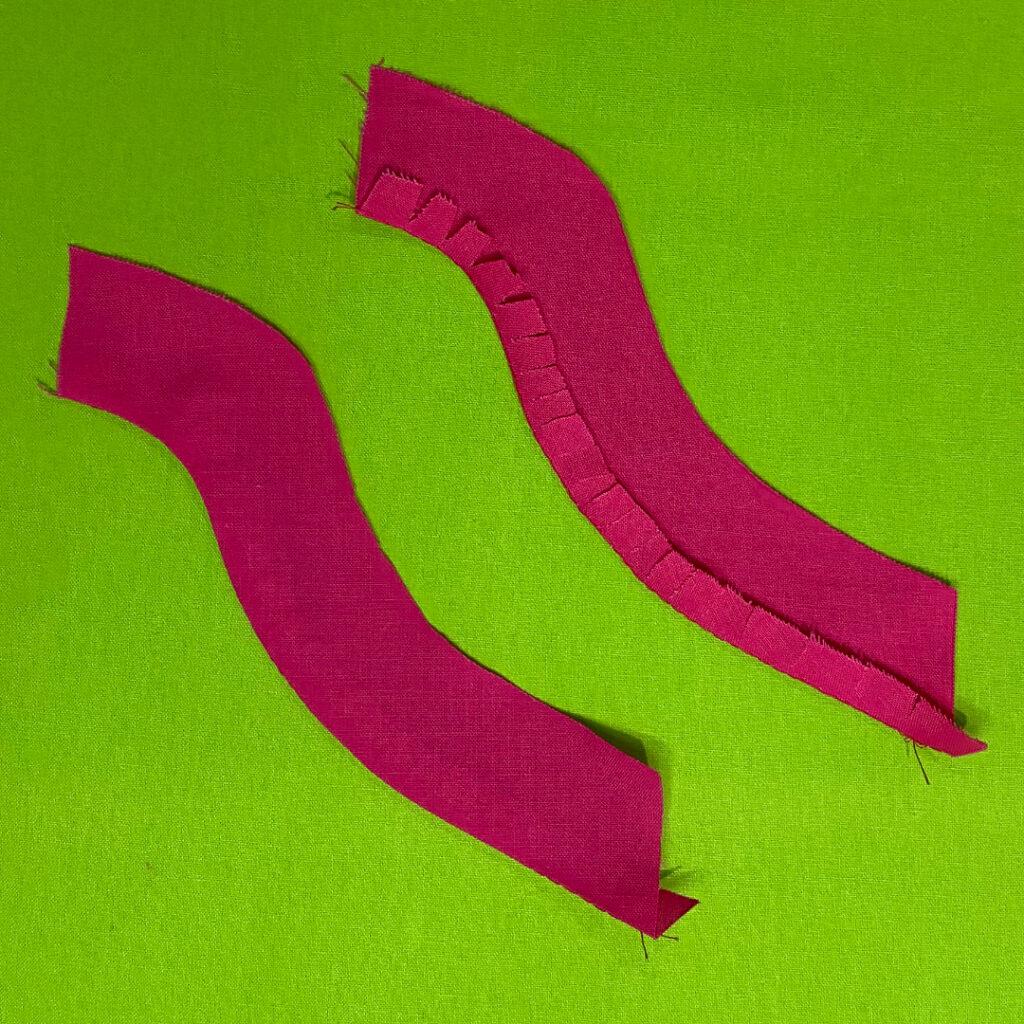
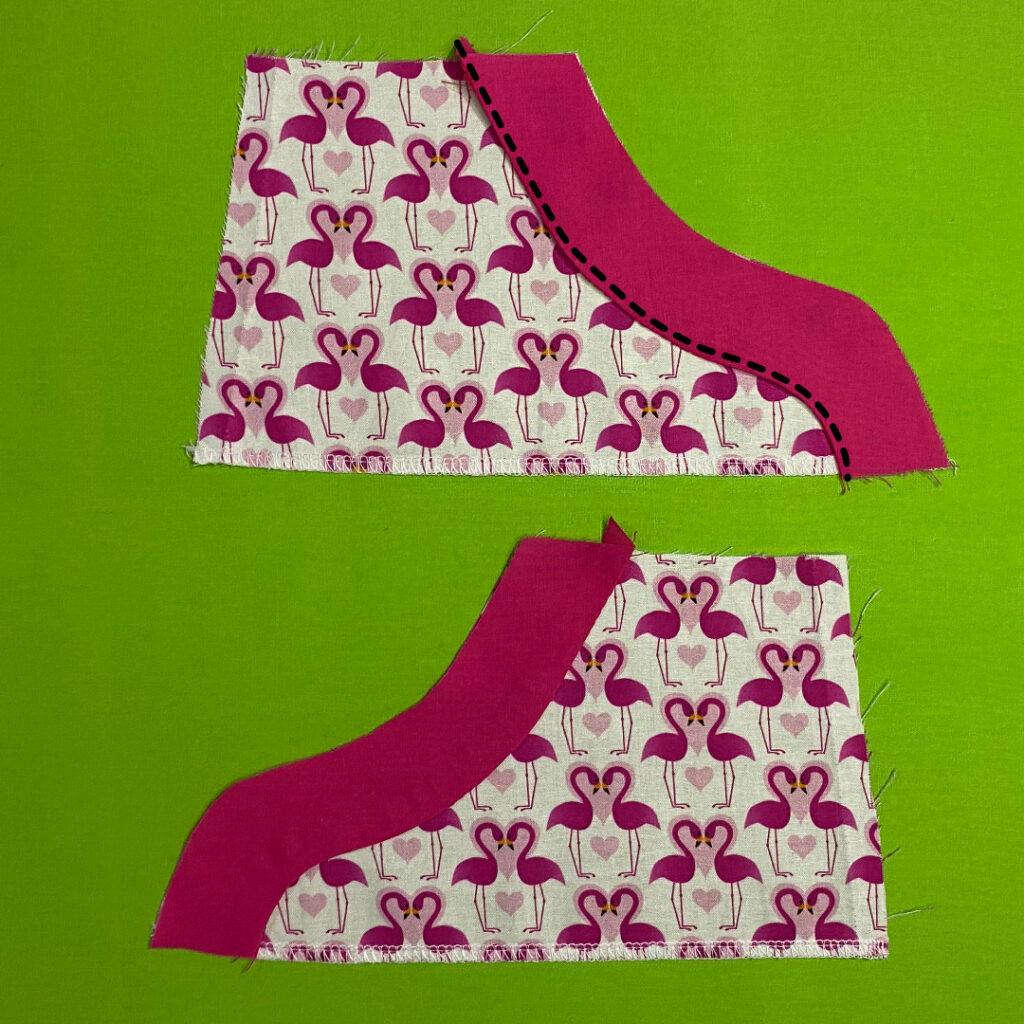
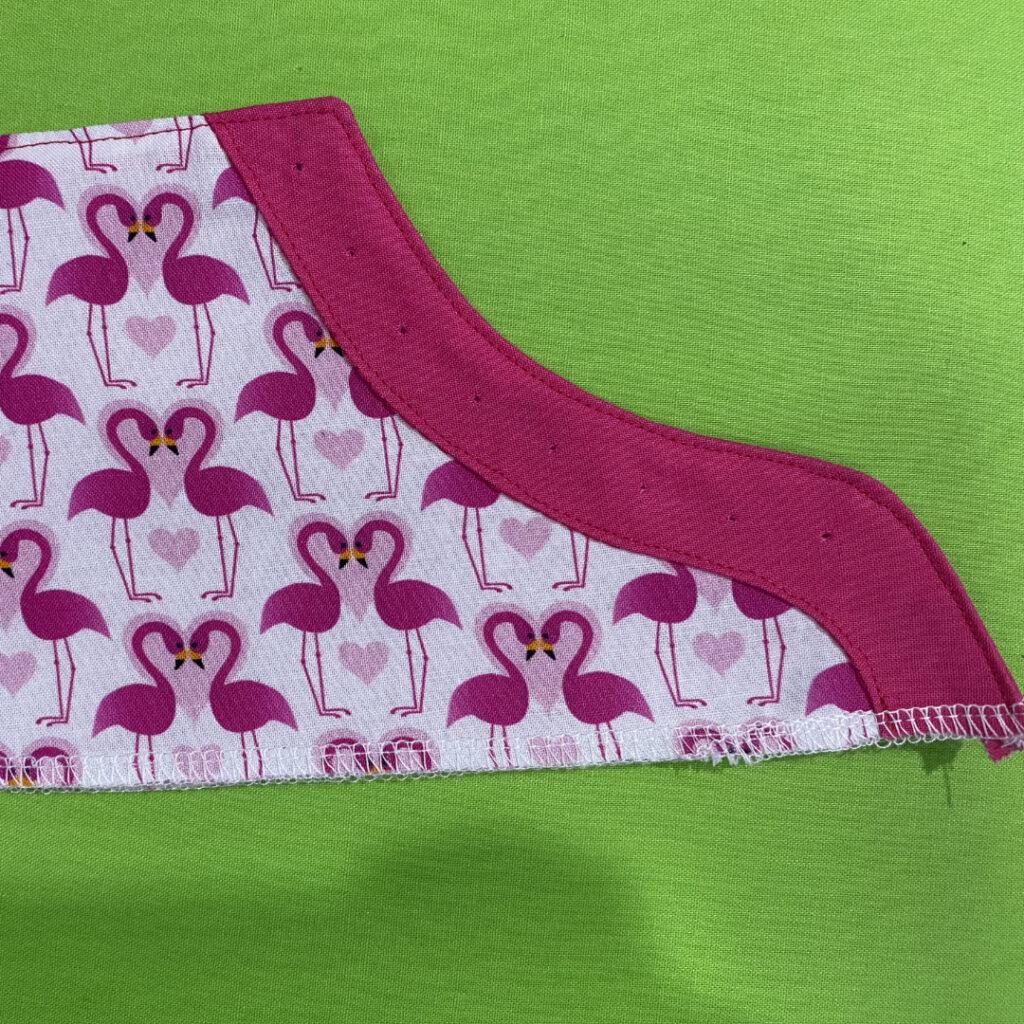
STEP 9 – SEW EYESTAY
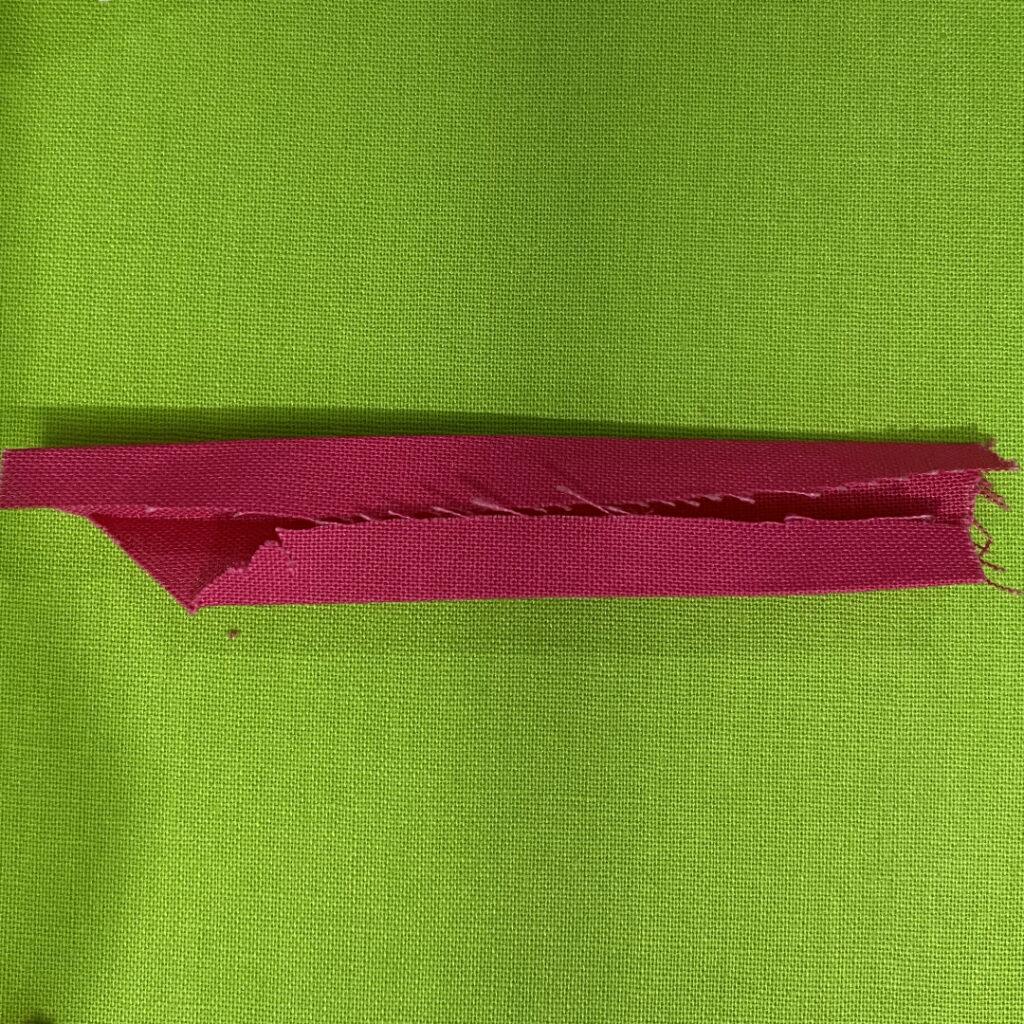
Stitch along the bottom edge of your eyestay piece at 1cm (3/8′).
Carefully clip the curves up to the stitching line
Fold the clipped edge towards the WRONG side along the stitching line.
Press.
Repeat for all 4 pieces.
Place your eyestay pieces over your front shoe pieces and top stitch along the bottom edge as close to the edge as you can manage.
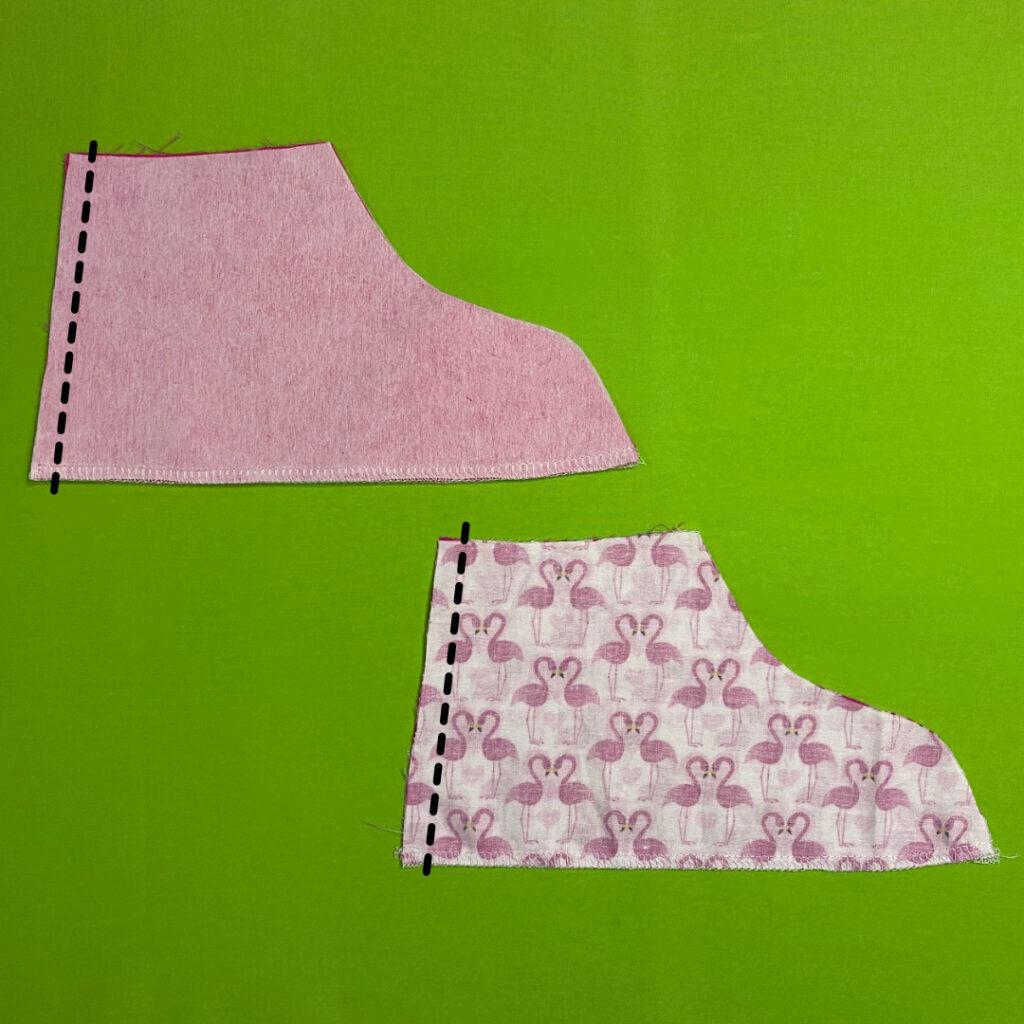
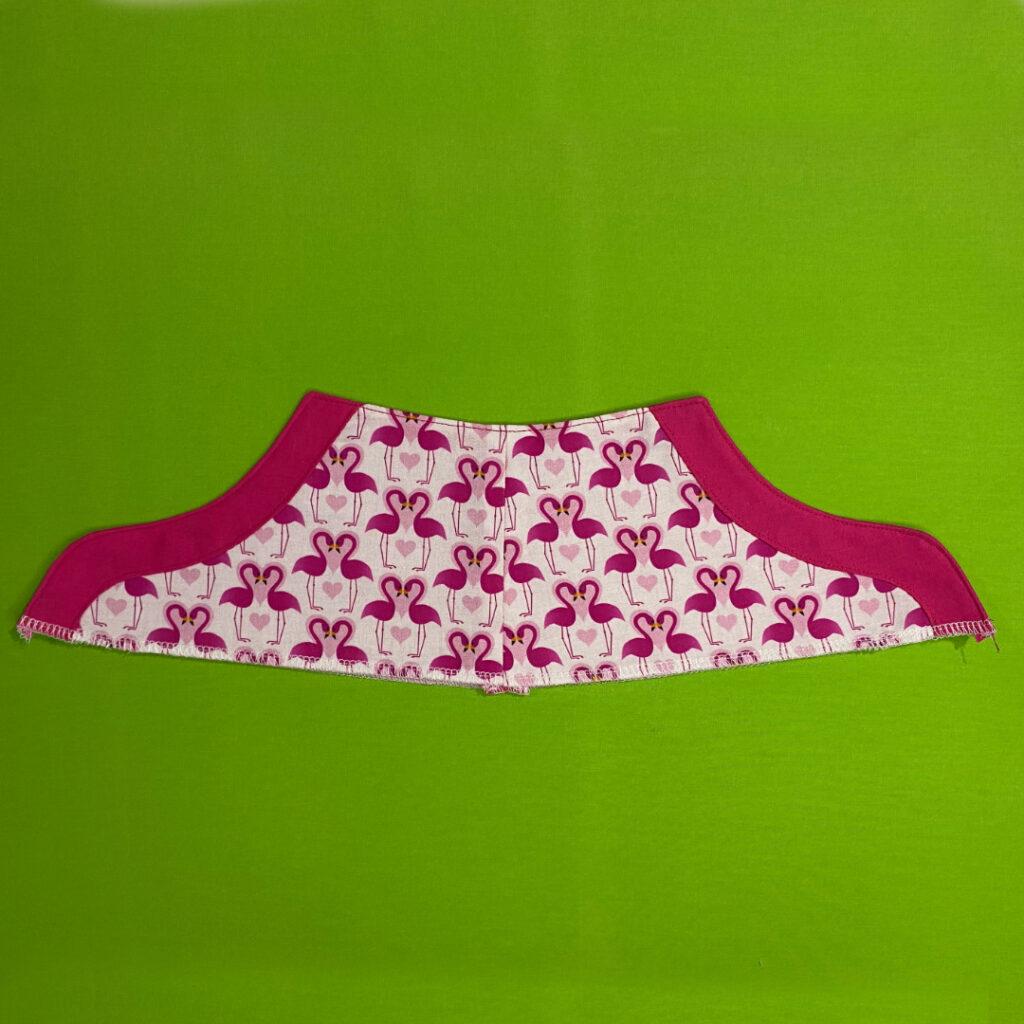
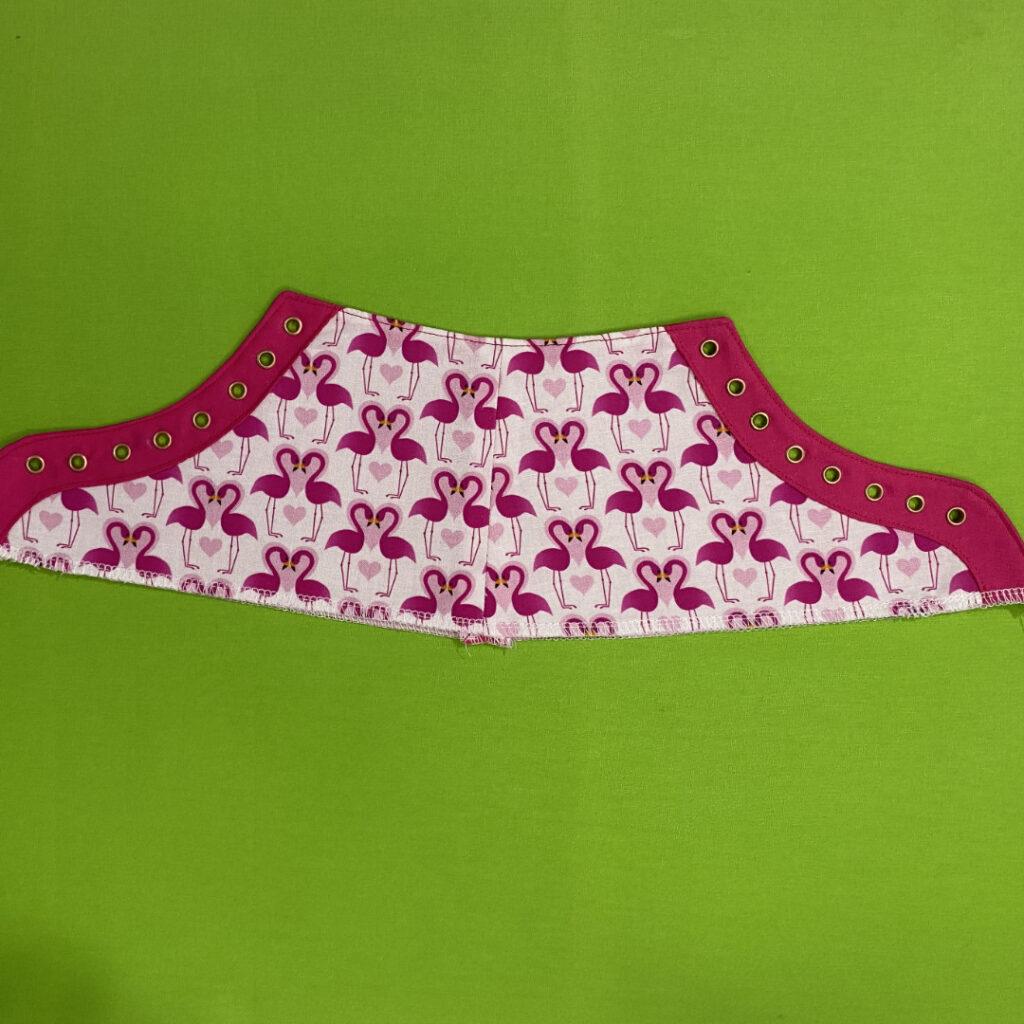
STEP 10 – SEW SHOE SIDE
With RIGHT sides together, stitch your side shoes pieces together using a 1cm (3/8′) seam.
Do this for both shoe fronts and both shoe linings.
Press seams open and machine neaten along the bottom edge.
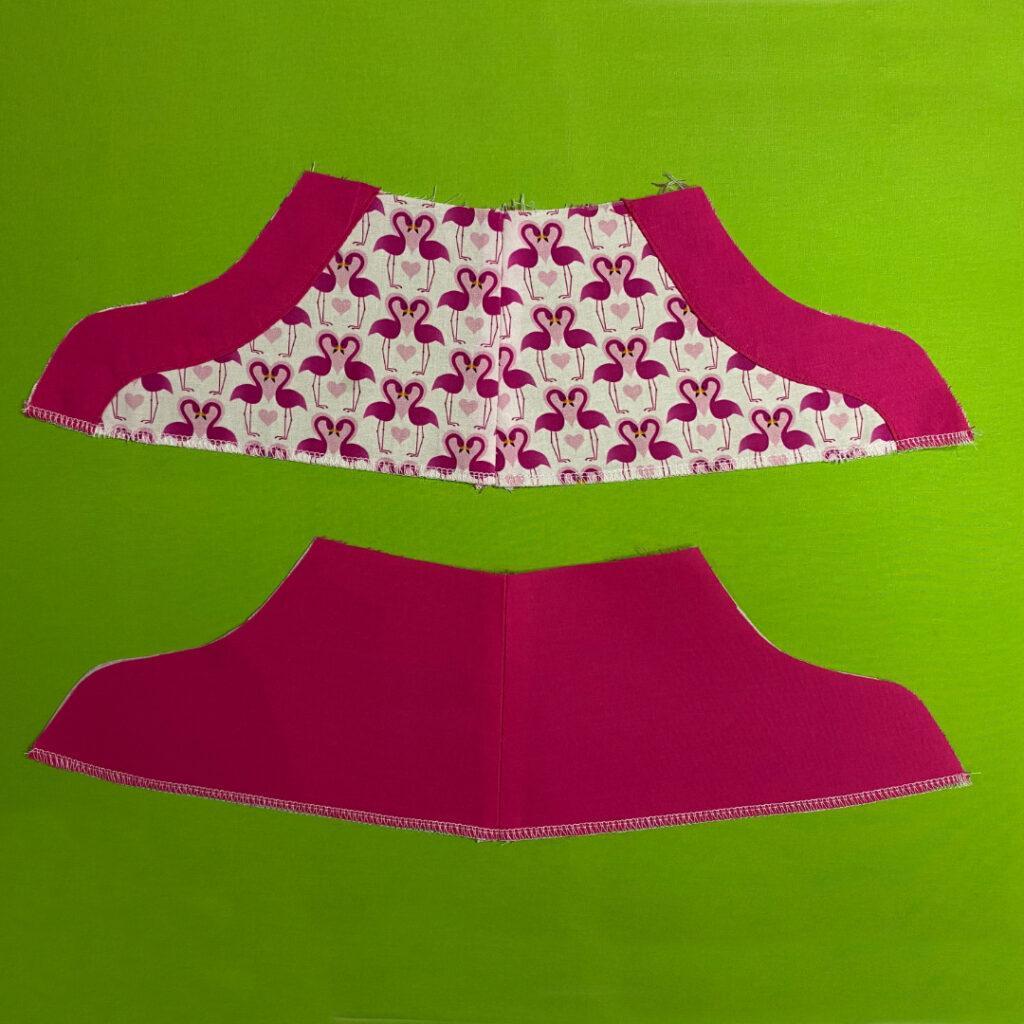
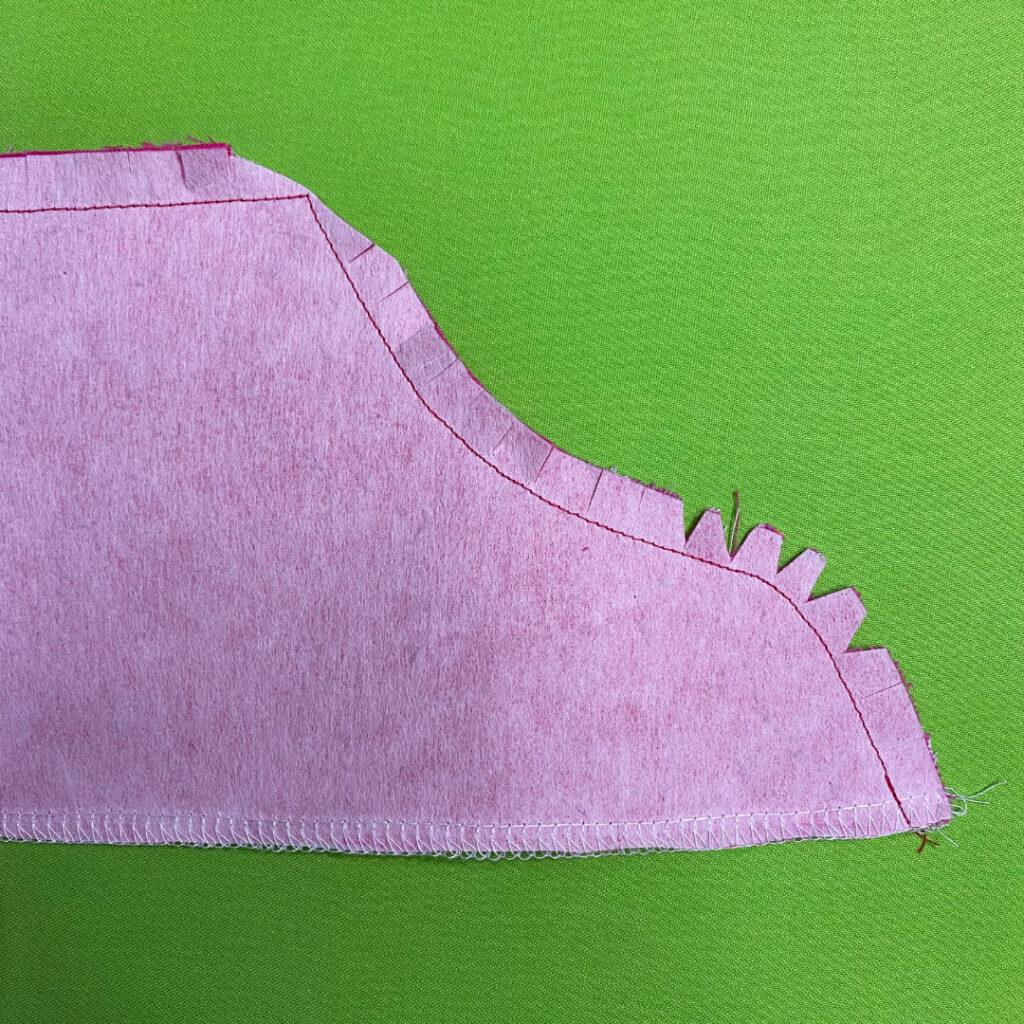
Place one of your lining pieces over one of your main pieces RIGHT sides together.
Stitch along the front edge and top edge, pivoting at corners and using a 1cm (3/8′) seam.
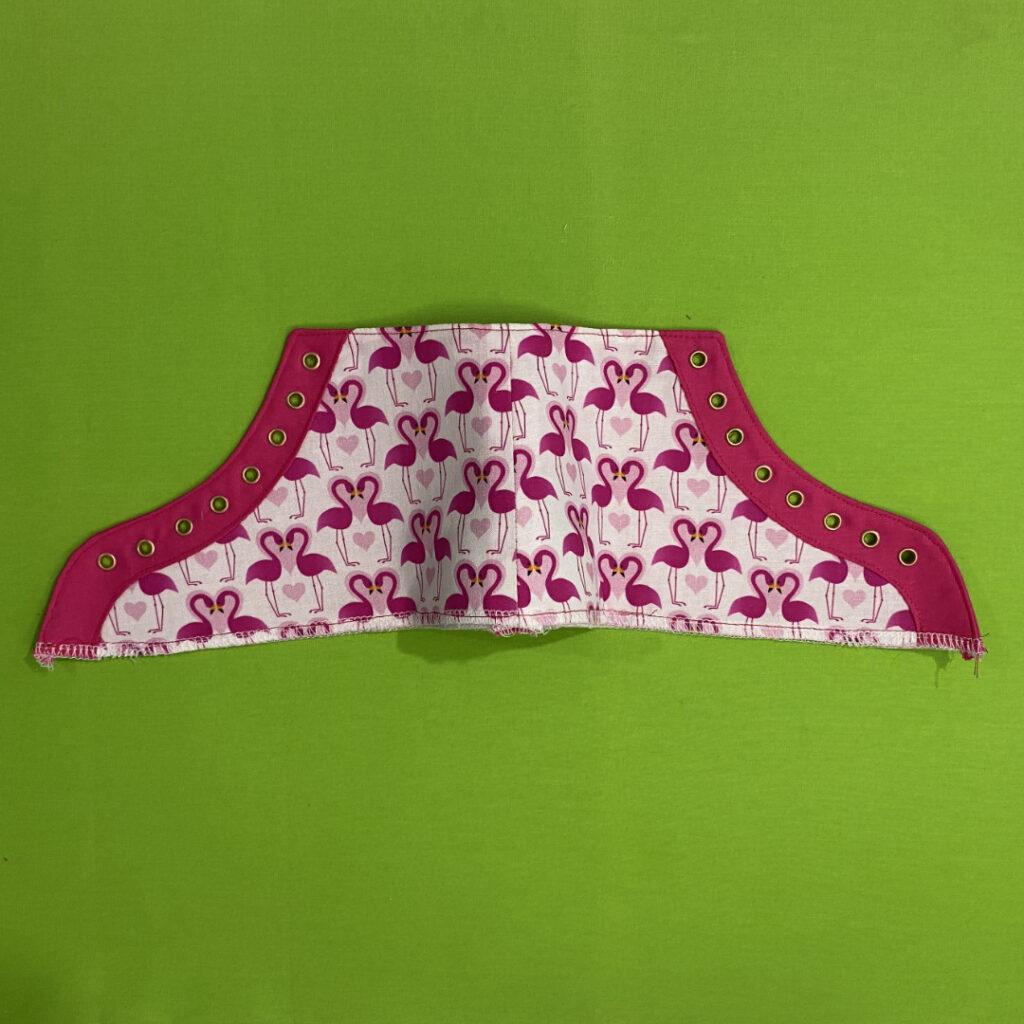
Clip corners and curves ensuring that you take out notches over the outward curve. Alternatively cut the seam with pinking shears.
Turn in the right way and press well.
Top stitch along the front and top edge, pivoting at corners.
Repeat with your other pieces.
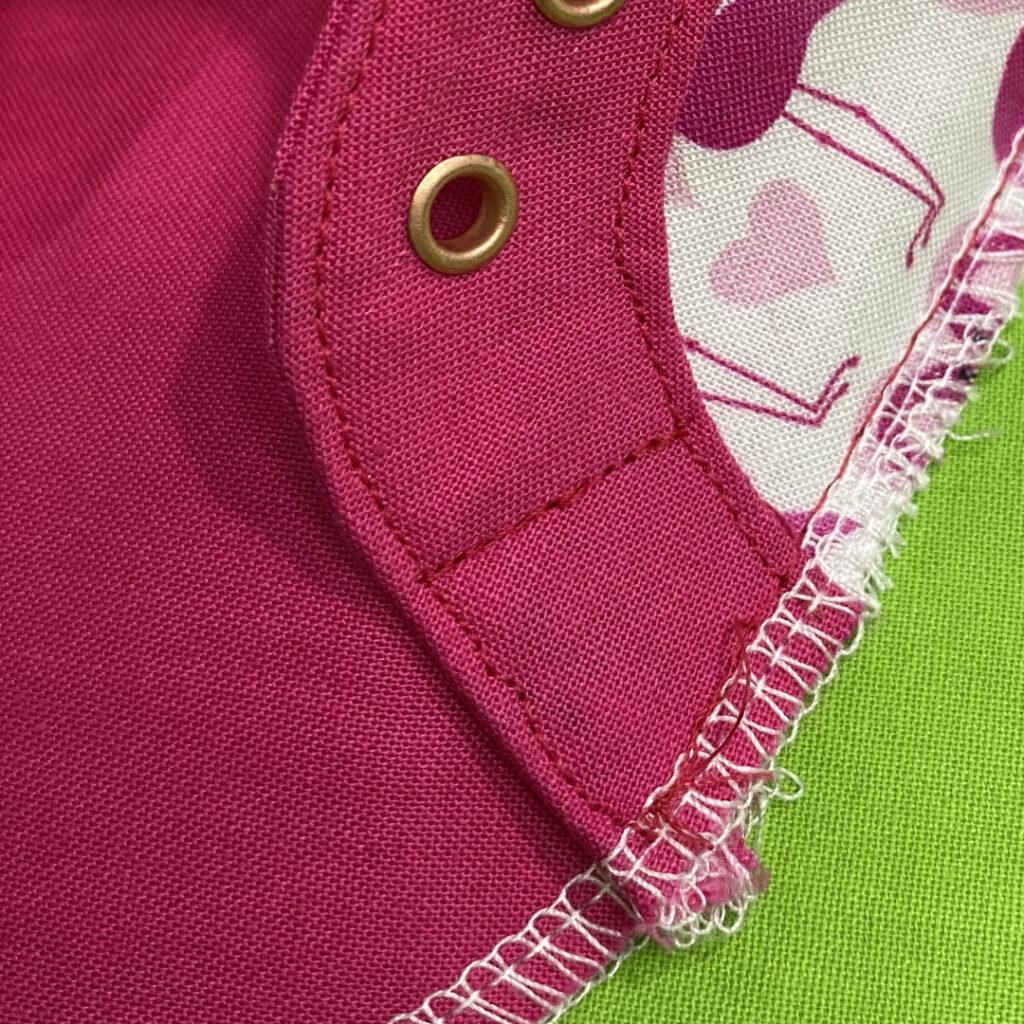
STEP 11 – EYELETS
To be able to accurately mark the placement for your eyelets, remove the seam allowance from your shoe side pattern piece. Lay the piece onto your fabric and mark the spots where the eyelets go.
I used a tailors awl to stab through the paper and into the fabric. Use a method that works for you.
To make the holes for the eyelets, you have a few options. One option is to use a rotary hole cutter, but if you don’t have one available, you can use a hole punch and a hammer. Make sure to place a piece of wood underneath while punching the holes. Another option is to use small sharp scissors to cut the holes.
Now it is time to insert the eyelets in the holes you have made. The method of attachment will depend on the type of eyelets you have. Make sure to follow the instructions provided with your eyelets.Mine came with pliers.
STEP 12 – HEEL CAPS
In this step, the decision to use the heel cap is optional. The heel cap provides stability and shape to the new shoes, but handstitching it to the sole can be challenging.
Place the heel cap inside the shoe, making sure its centred and the bottom edge is aligned with the bottom of the shoe. Clip in place.
Baste stitch along the bottom edge to secure the lining, outer piece and heel cap in place. You may want to consider if your sewing machine is heavy duty enough to stitch through the heel cap. If you are concerned, tack in place by hand.
Repeat for other shoe.
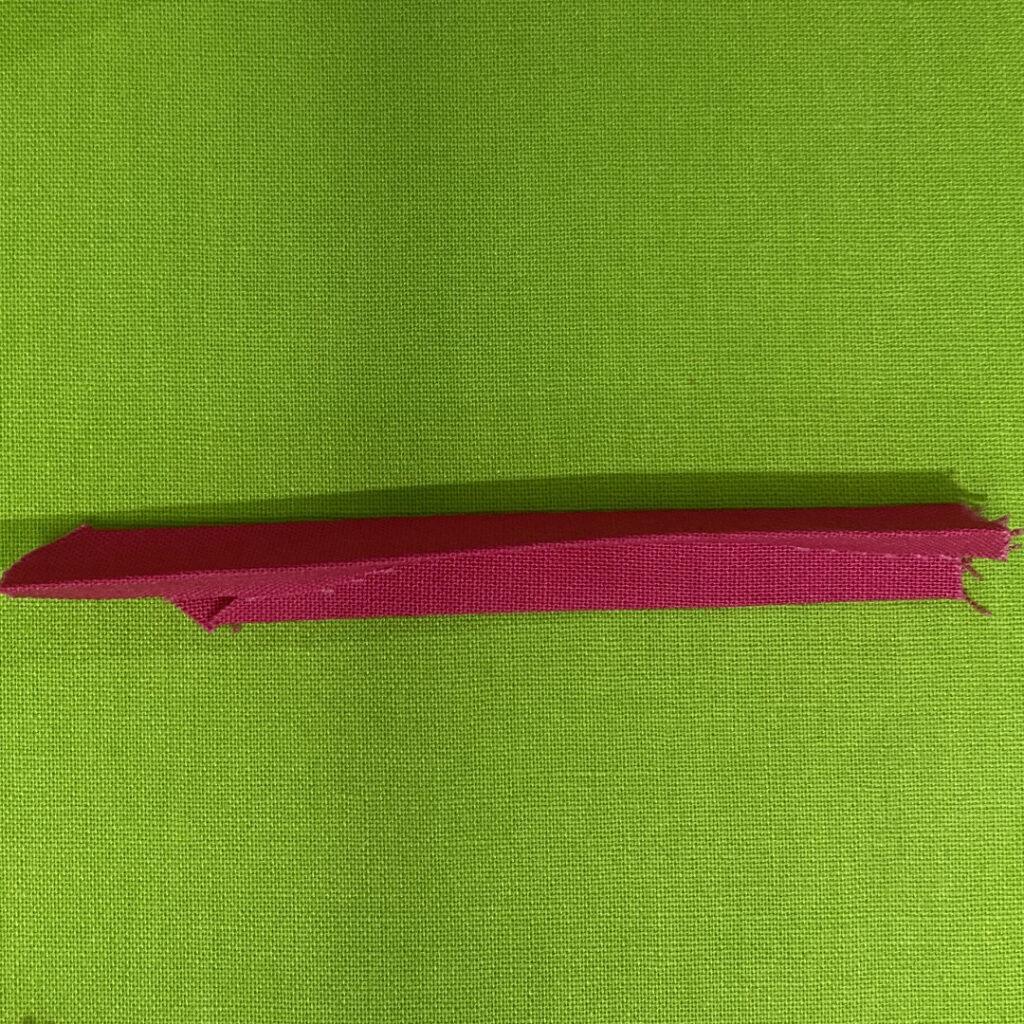
STEP – 13 – HEEL TAB
Cut a piece of fabric from your scraps for you heel tab. You can choose the desired width but make sure the piece is long enough to cover the length of the back of the shoe plus extra for the tab.
Whatever width you would like the tab to be, times that by 4. My piece was 6cm wide for a 1.5cm heel tab.
Fold each of the long raw edges in towards the wrong side to meet in the middle. Press.
Fold in half again so that the two long folded edges meet. Press once more.
Line the belt tab along the centre back of the shoe. Fold the top under to be your tab. Cut off any excess and clip in place.
Stitch along one side, close to the edge. Pivot and stitch across the top. Pivot again and stitch back down the other side.
Note: If you are using the heel cap but not stitching through with you machine, stitch the bottom half to the outside only.
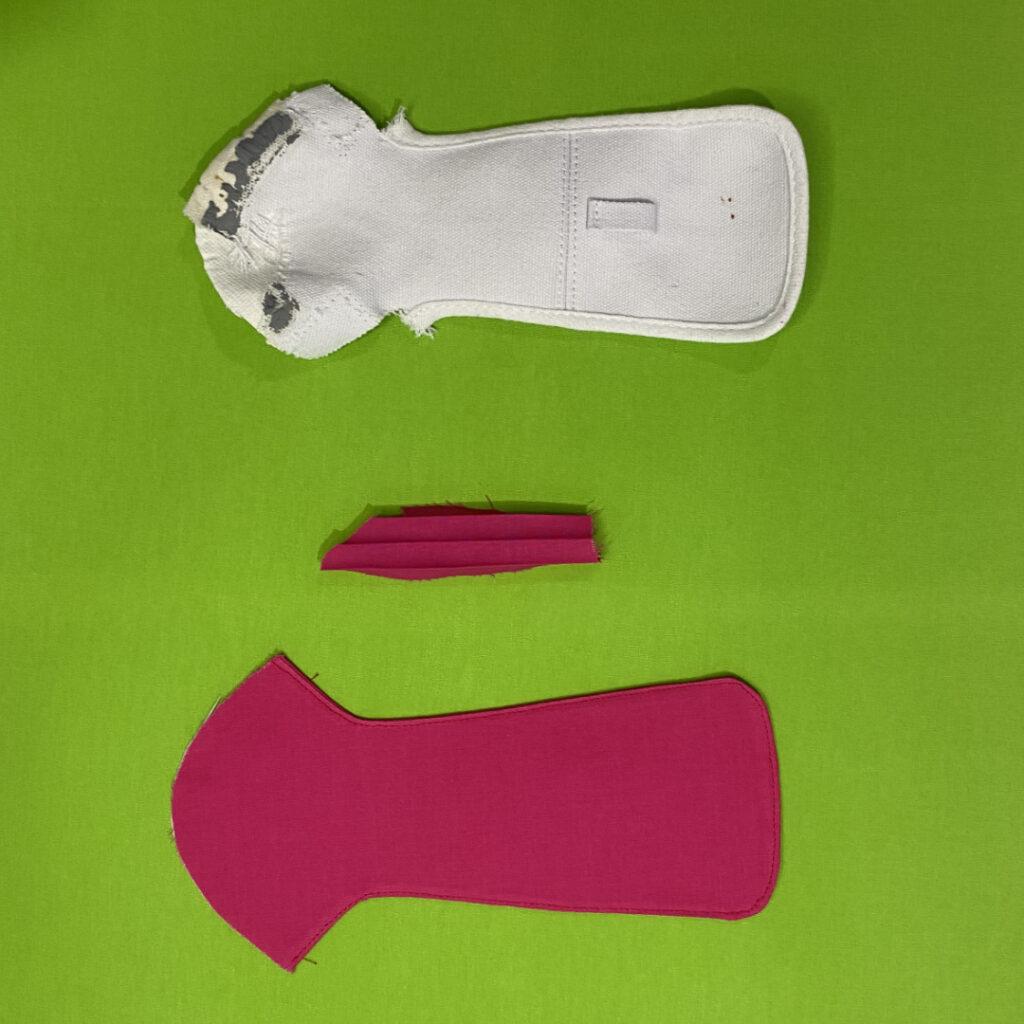
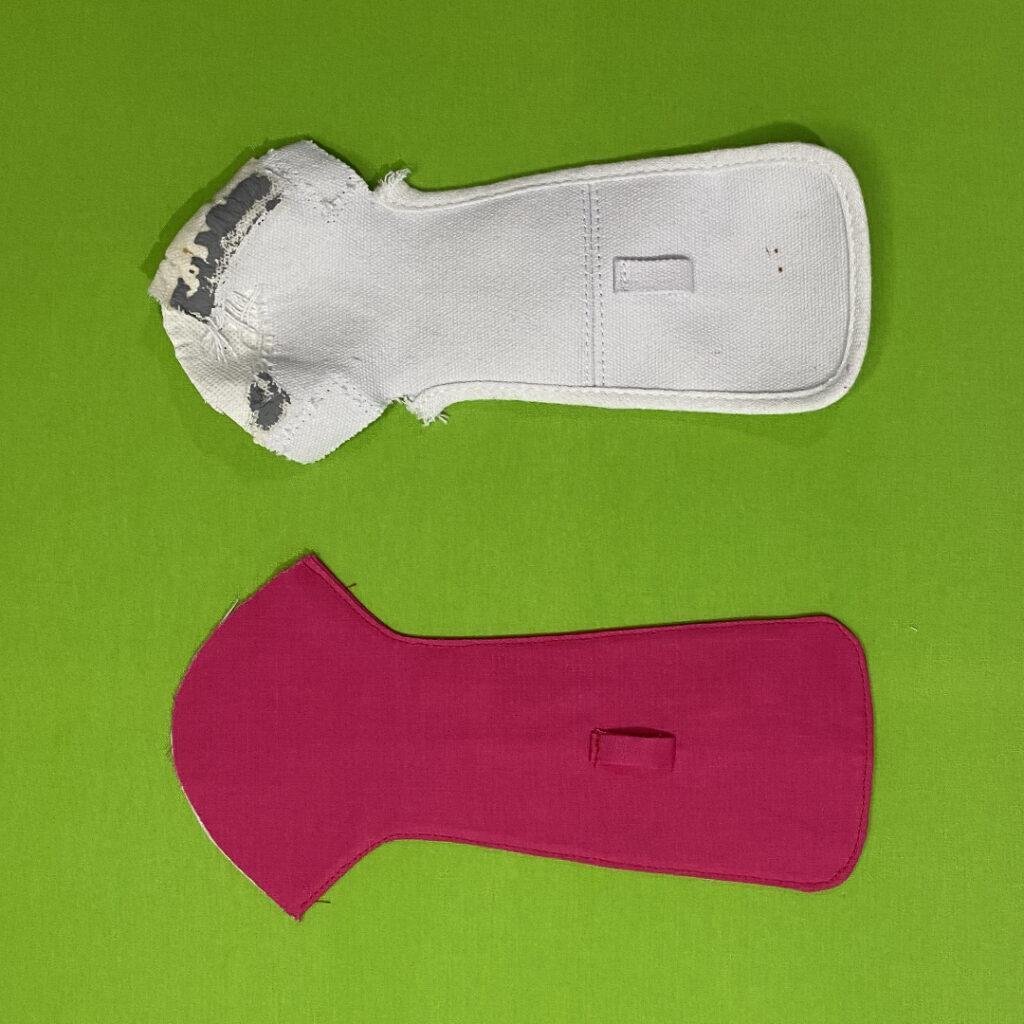
STEP 14 – SEW TONGUE
Take the tongue main piece and tongue lining piece and place them right sides together.
Sew around the outer edge, pivoting at the corners and leaving the bottom open.
Clip the curves, turn the piece right sides out and press it well.
Topstitch around the outer edge close to the edge.
Machine neaten the bottom edge closed.
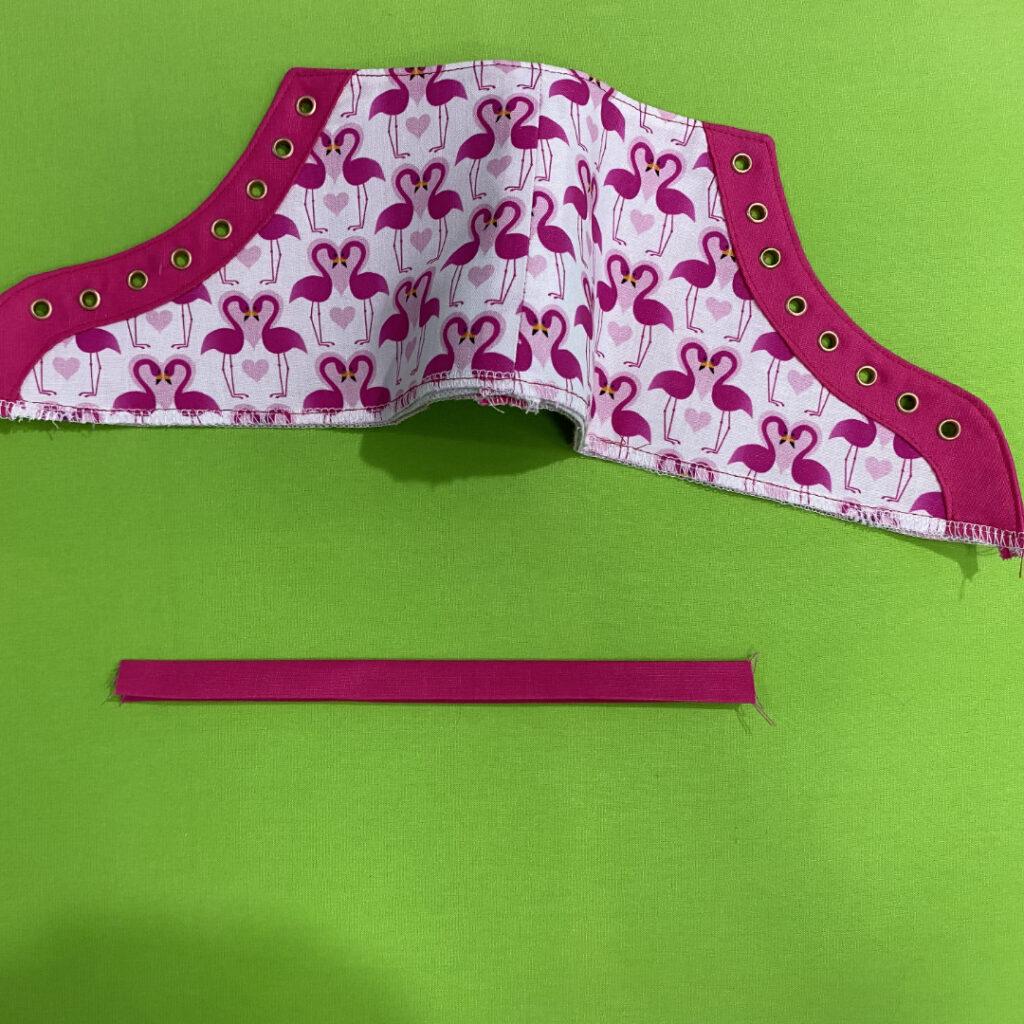
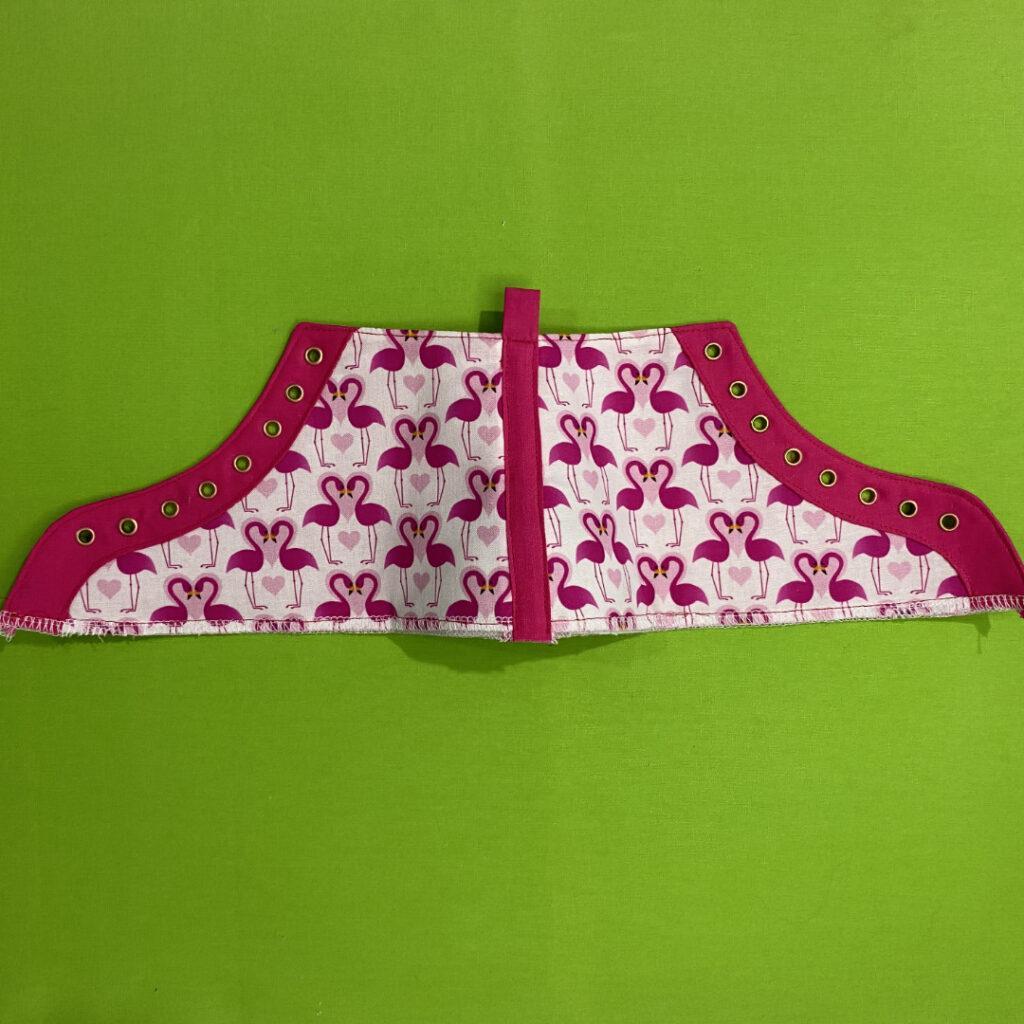
If you would like to make a tongue lock like mine, create a small strip the same way you created the heel tab.
Stitch one edge in place, making sure to put it in the same spot as the original tongue.
Fold over and fold under each edge.
Stitch over each edge, reversing over a few times to secure.
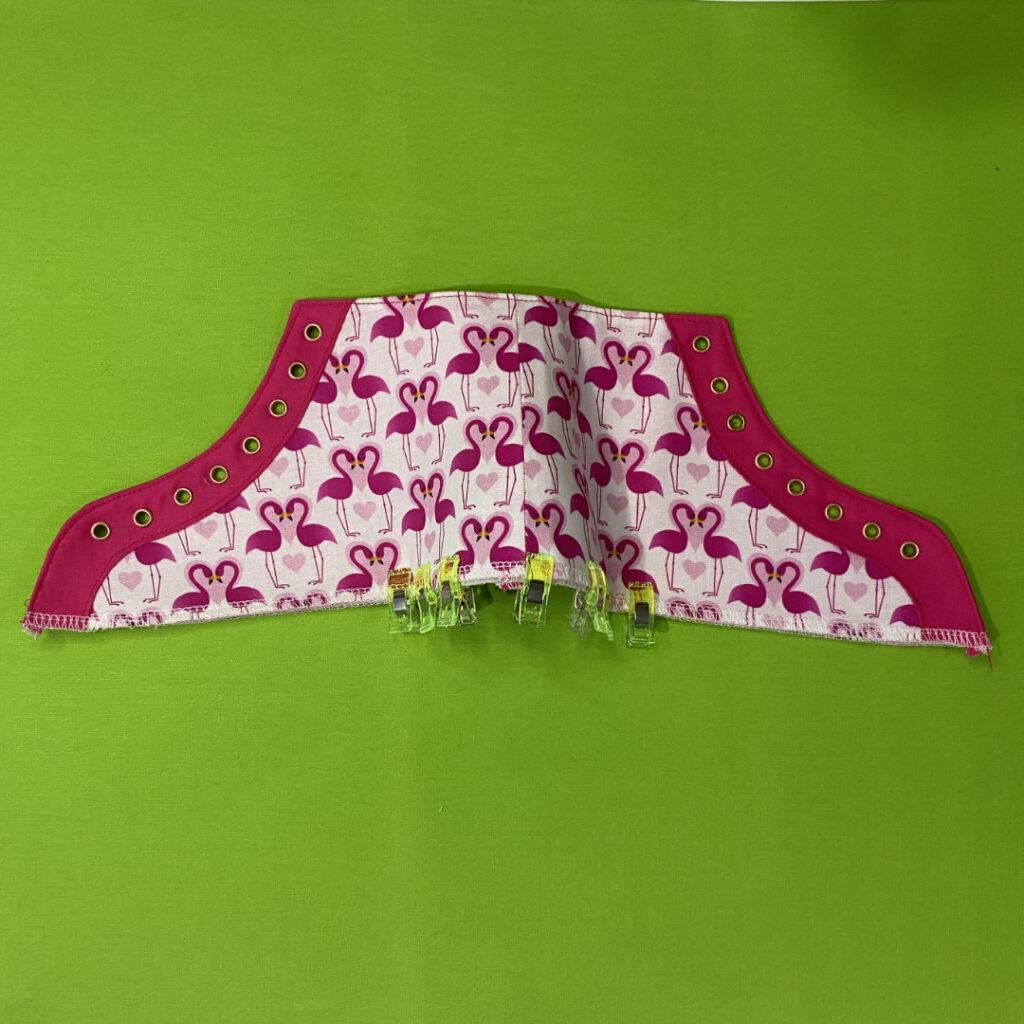
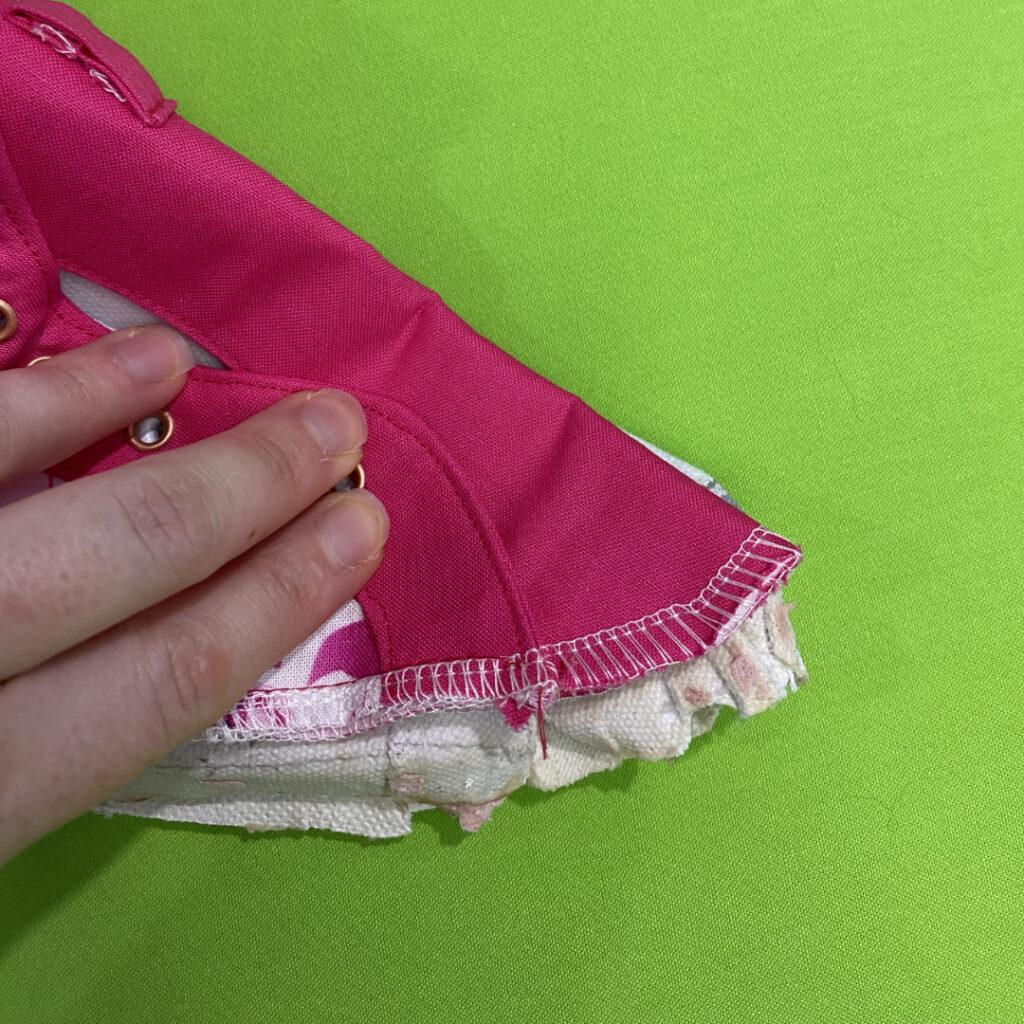
STEP 15 – ASSEMBLE THE SHOE
Take the partially assembled shoe and fold it in half. Then, insert the tongue into the shoe so that the two halves match.
Place the assembled pieces over the existing shoe (the one we didn’t unpick) and adjust as needed until your shoe matches the original shoe.
Pin or clip the two pieces together.
Check that the assembled shoe fits into the sole and make any necessary adjustments.
Once you are happy with the fit, stitch the shoe and tongue together along the eyestay piece as per the photo below.
Your shoe should now be fully assembled and ready to be attached to the sole.
Repeat the process for the other shoe.
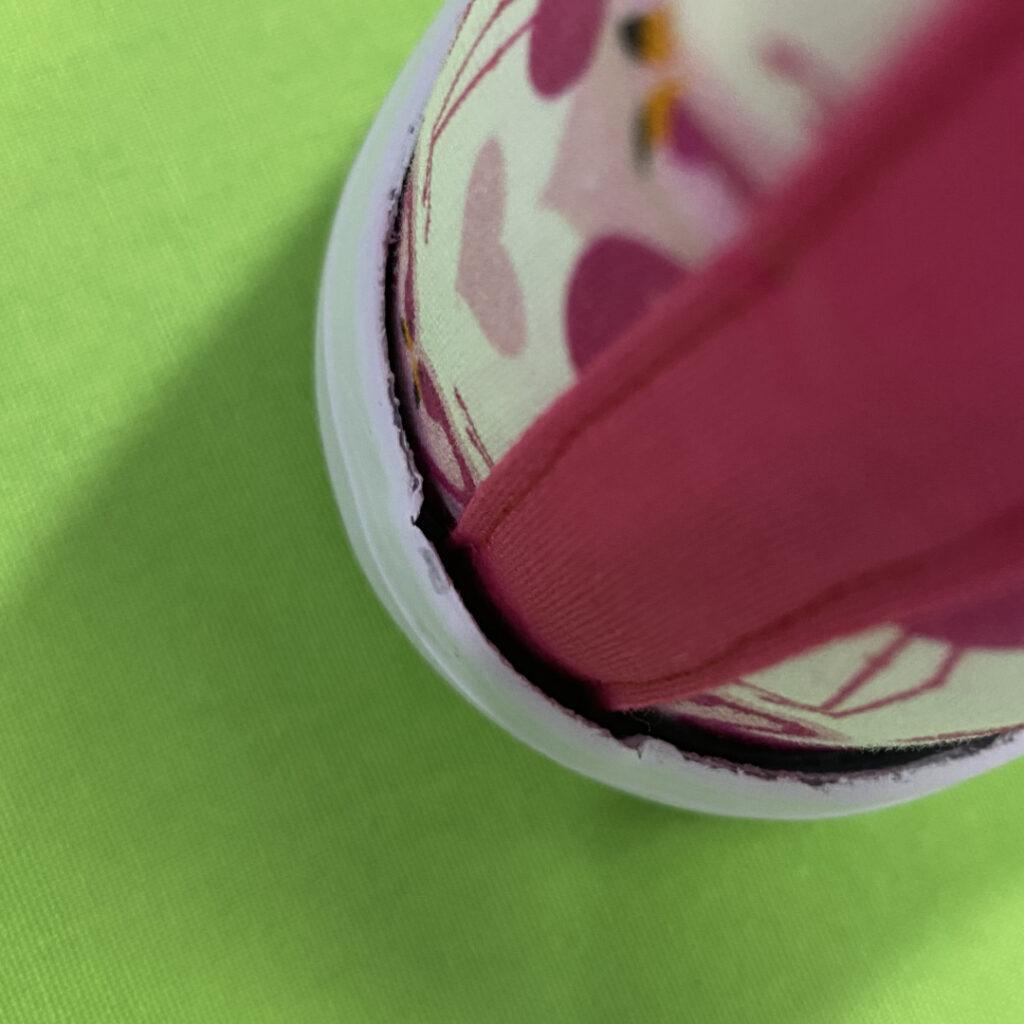
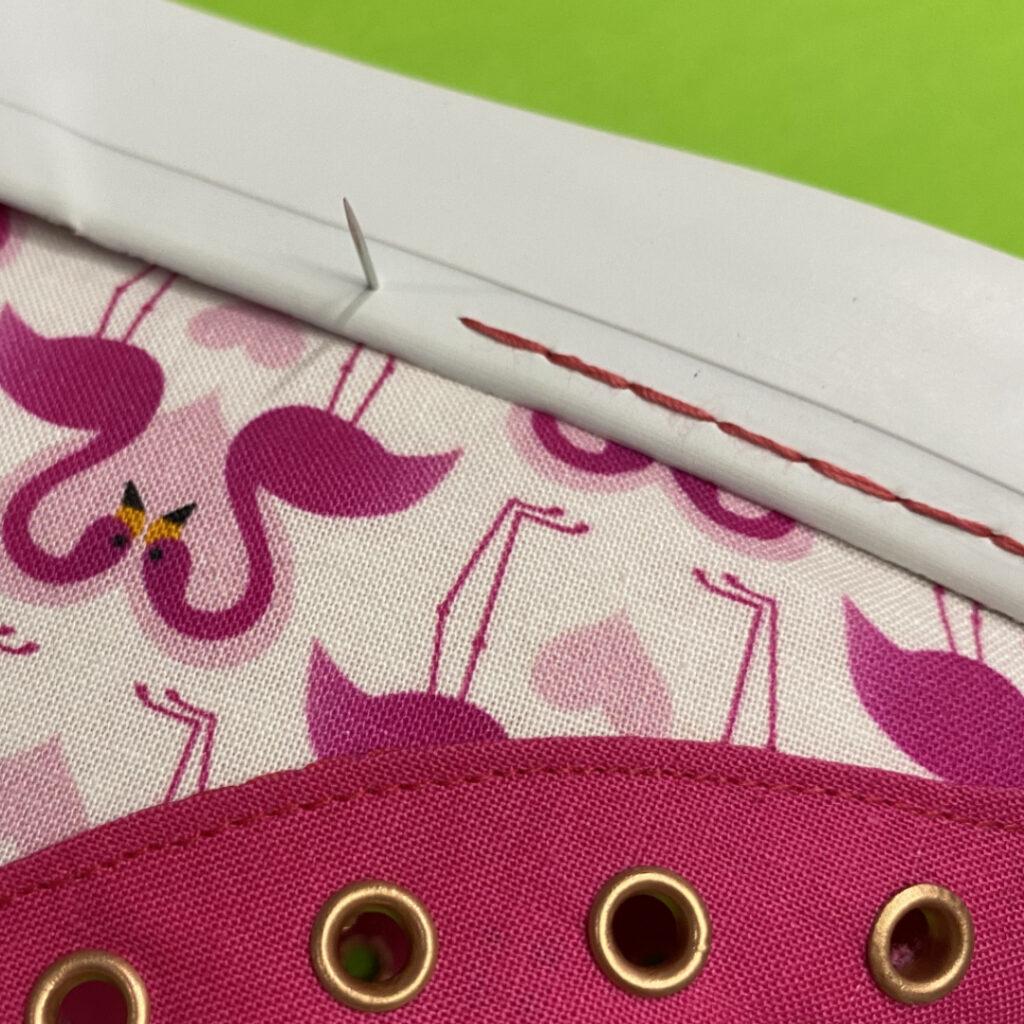
STEP 16 – ATTACH THE SHOE TO THE SOLE
Place the assembled shoe inside the sole, making sure it fits into the grooves in the sole. Secure the shoe in place using clips.
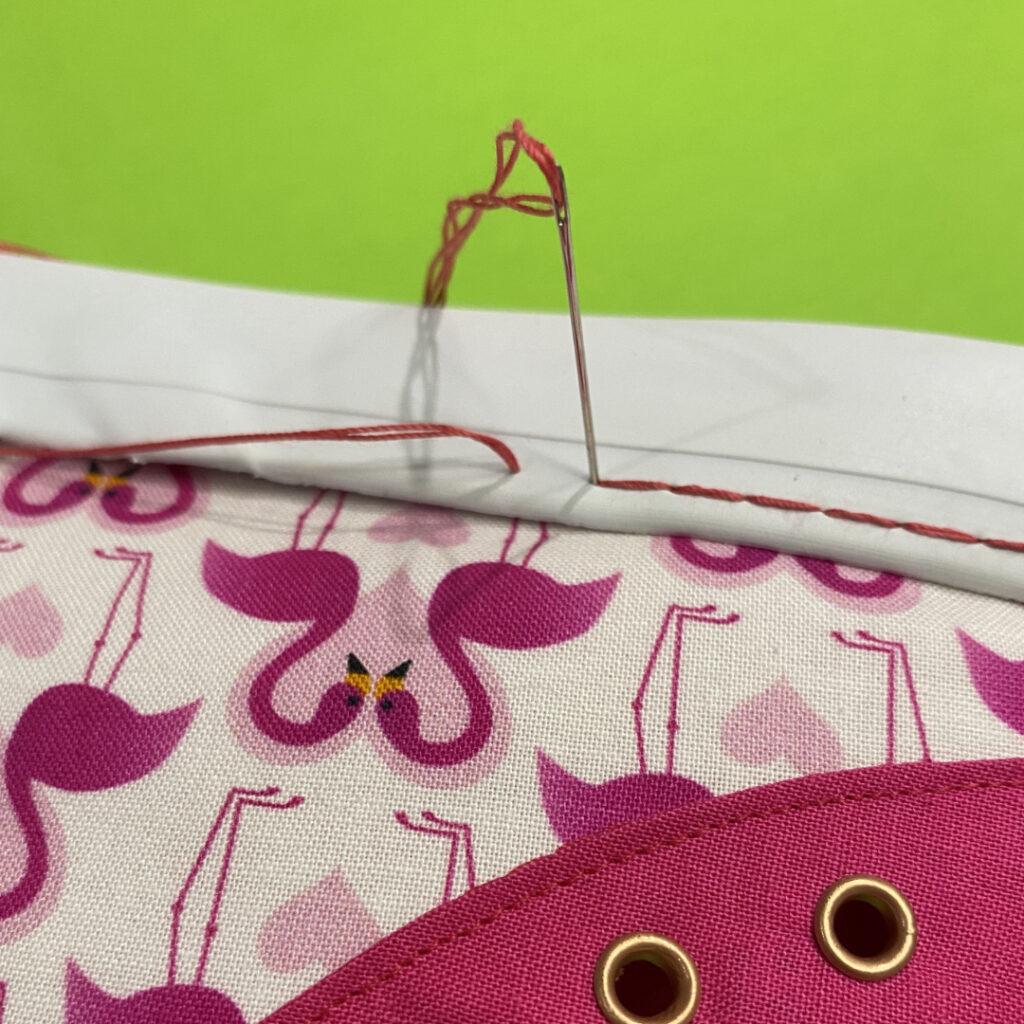
Using a strong needle and topstitching thread, sew the shoe to the sole using a backstitch. A thimble may come in handy, as pushing the needle through can be challenging. In some cases, you may need to use pliers to pull the needle through.
When you reach the heel cap, use a tailors awl to make holes for the needle to go through
BACK STITCH
Back stitch is a strong, durable sewing technique and is perfect for shoe making.
Push your needle through from the inside, one stitch length past your previous stitch.
Reinsert the needle from the outside of the material and bring it back to the starting point of the previous stitch.
Repeat this process until you reach the end of your stitching line. This will create a strong, secure stitch.
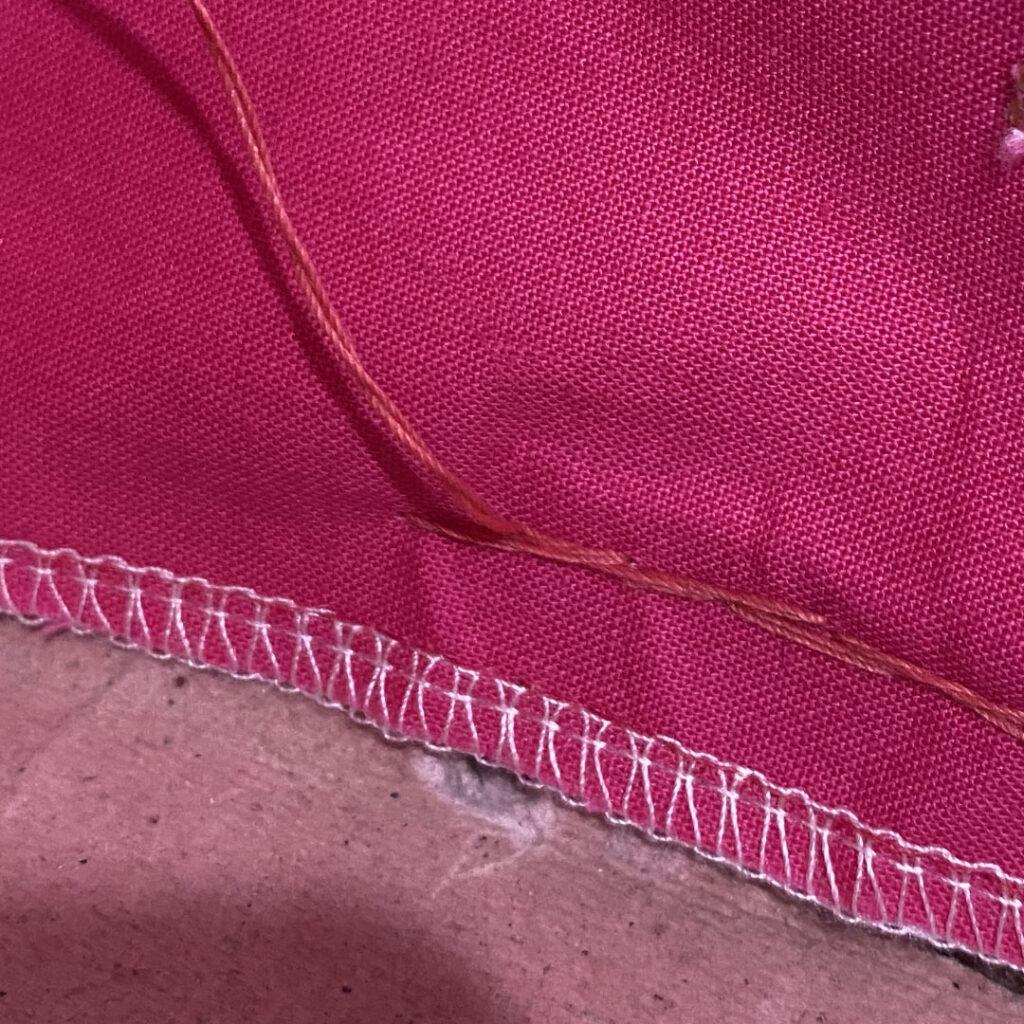
The wrong side of the stitch will look like the picture below.
Congratulations! You have just finished creating your very own pair of shoes.
We would love to see your creations in our facebook group Twine Tree Tribe. Don’t hesitate to share your masterpiece and show off your hard work.
Thank you for supporting small, handmade business like ours. We truly appreciate your support.